


Webflow comes with a built-in slider that is not even close to what Swiper offers. In this article, we'll look at how to integrate Swiper into your Webflow site to get a best-in-class slider and make your pages stand out!
Collection
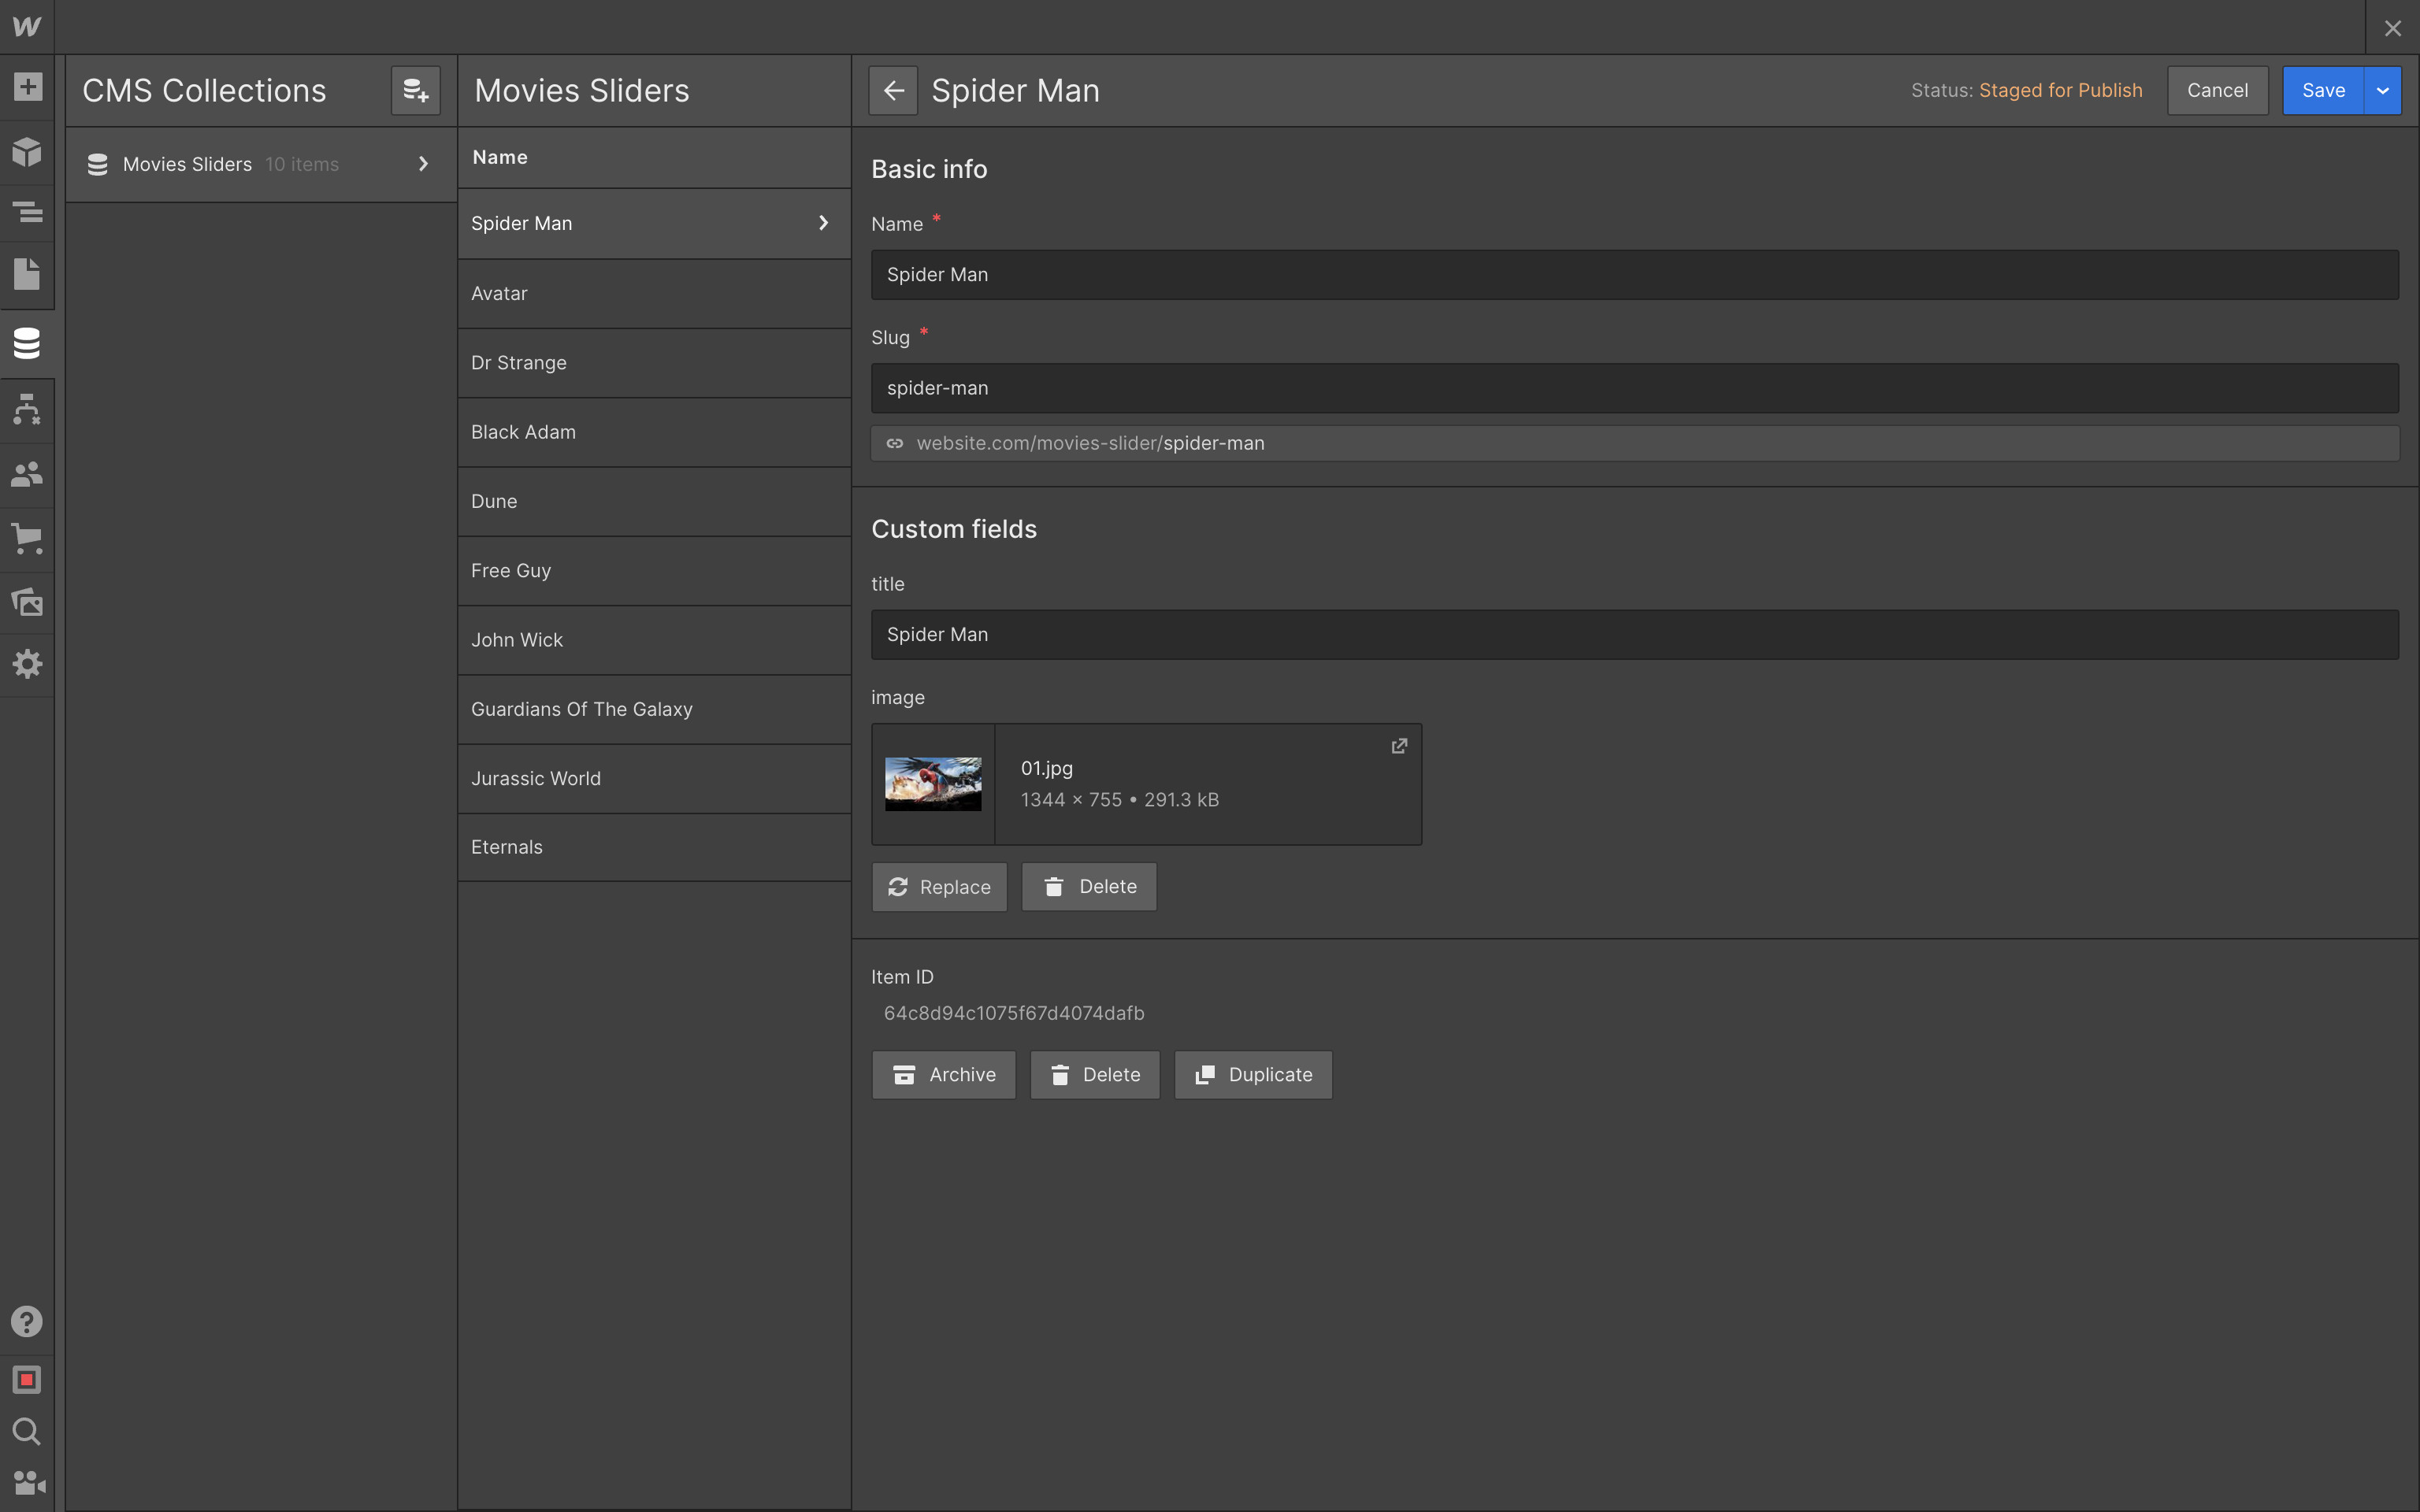
First, as we want to use Webflow's CMS features, we need to create a collection with slides. I have created a simple collection called "Movies Sliders" with additional title and image fields.
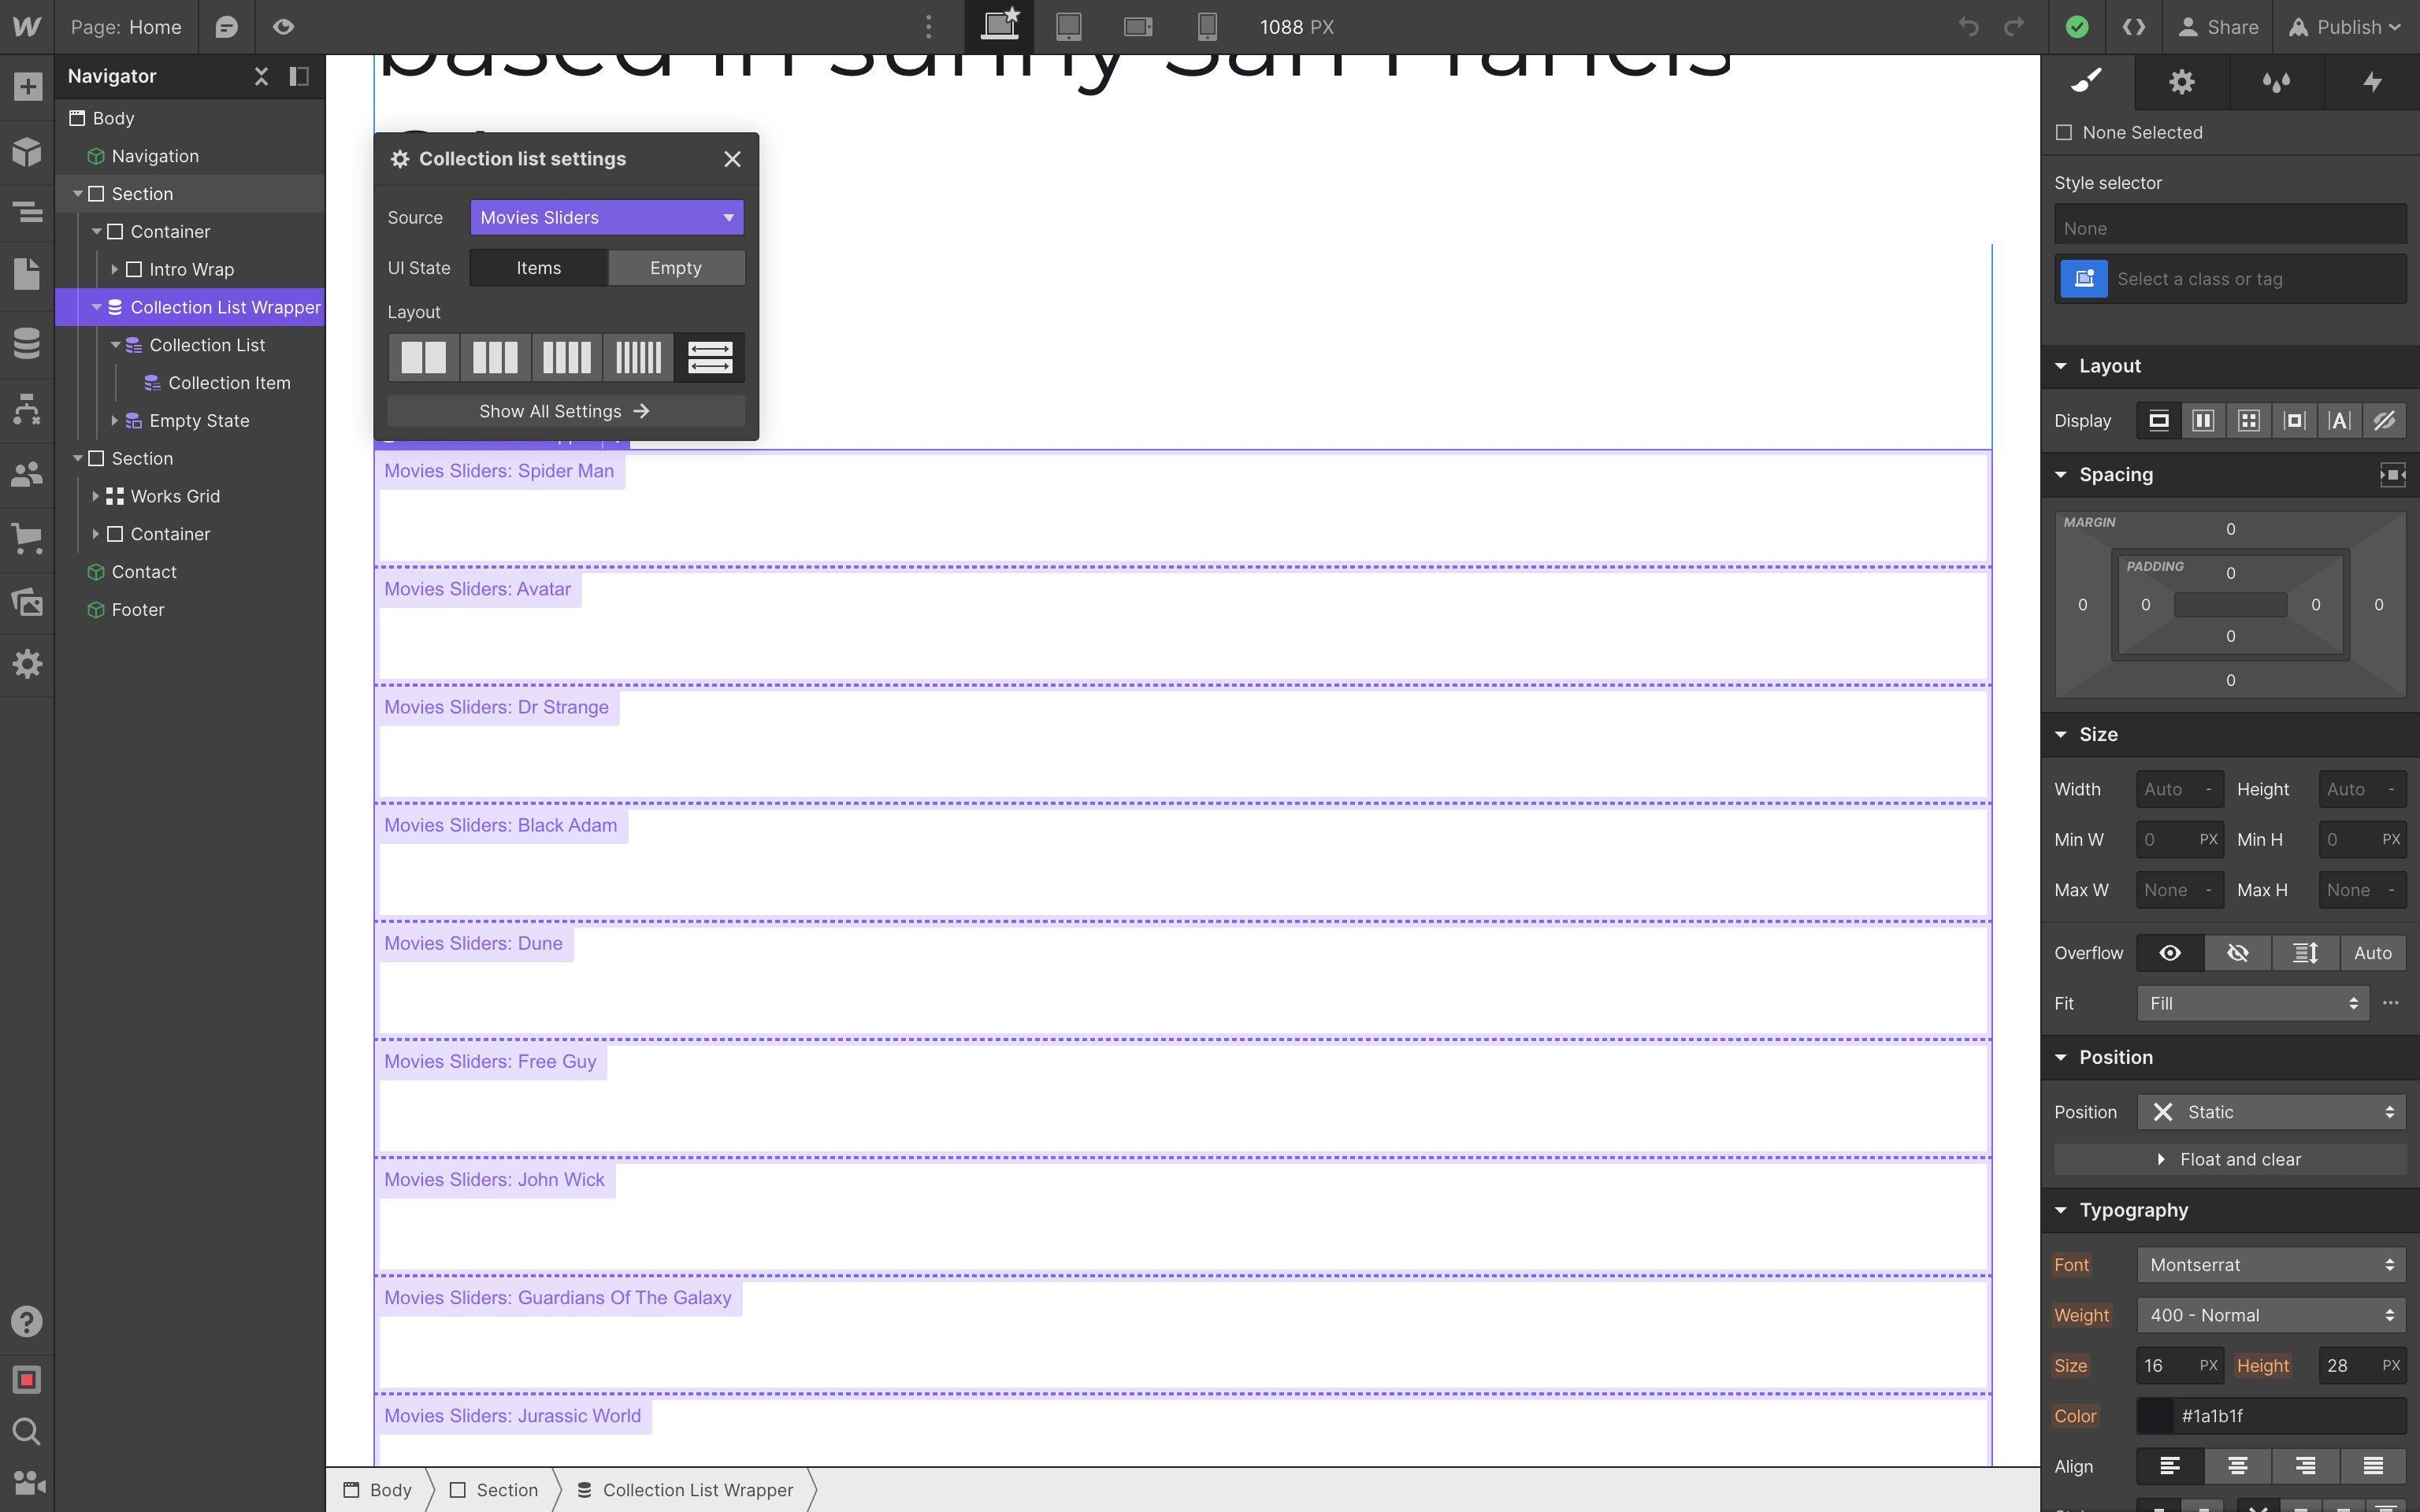
Next, add collection to the place where we want to place our slider,

and choose "Movies Sliders" collection as a source:
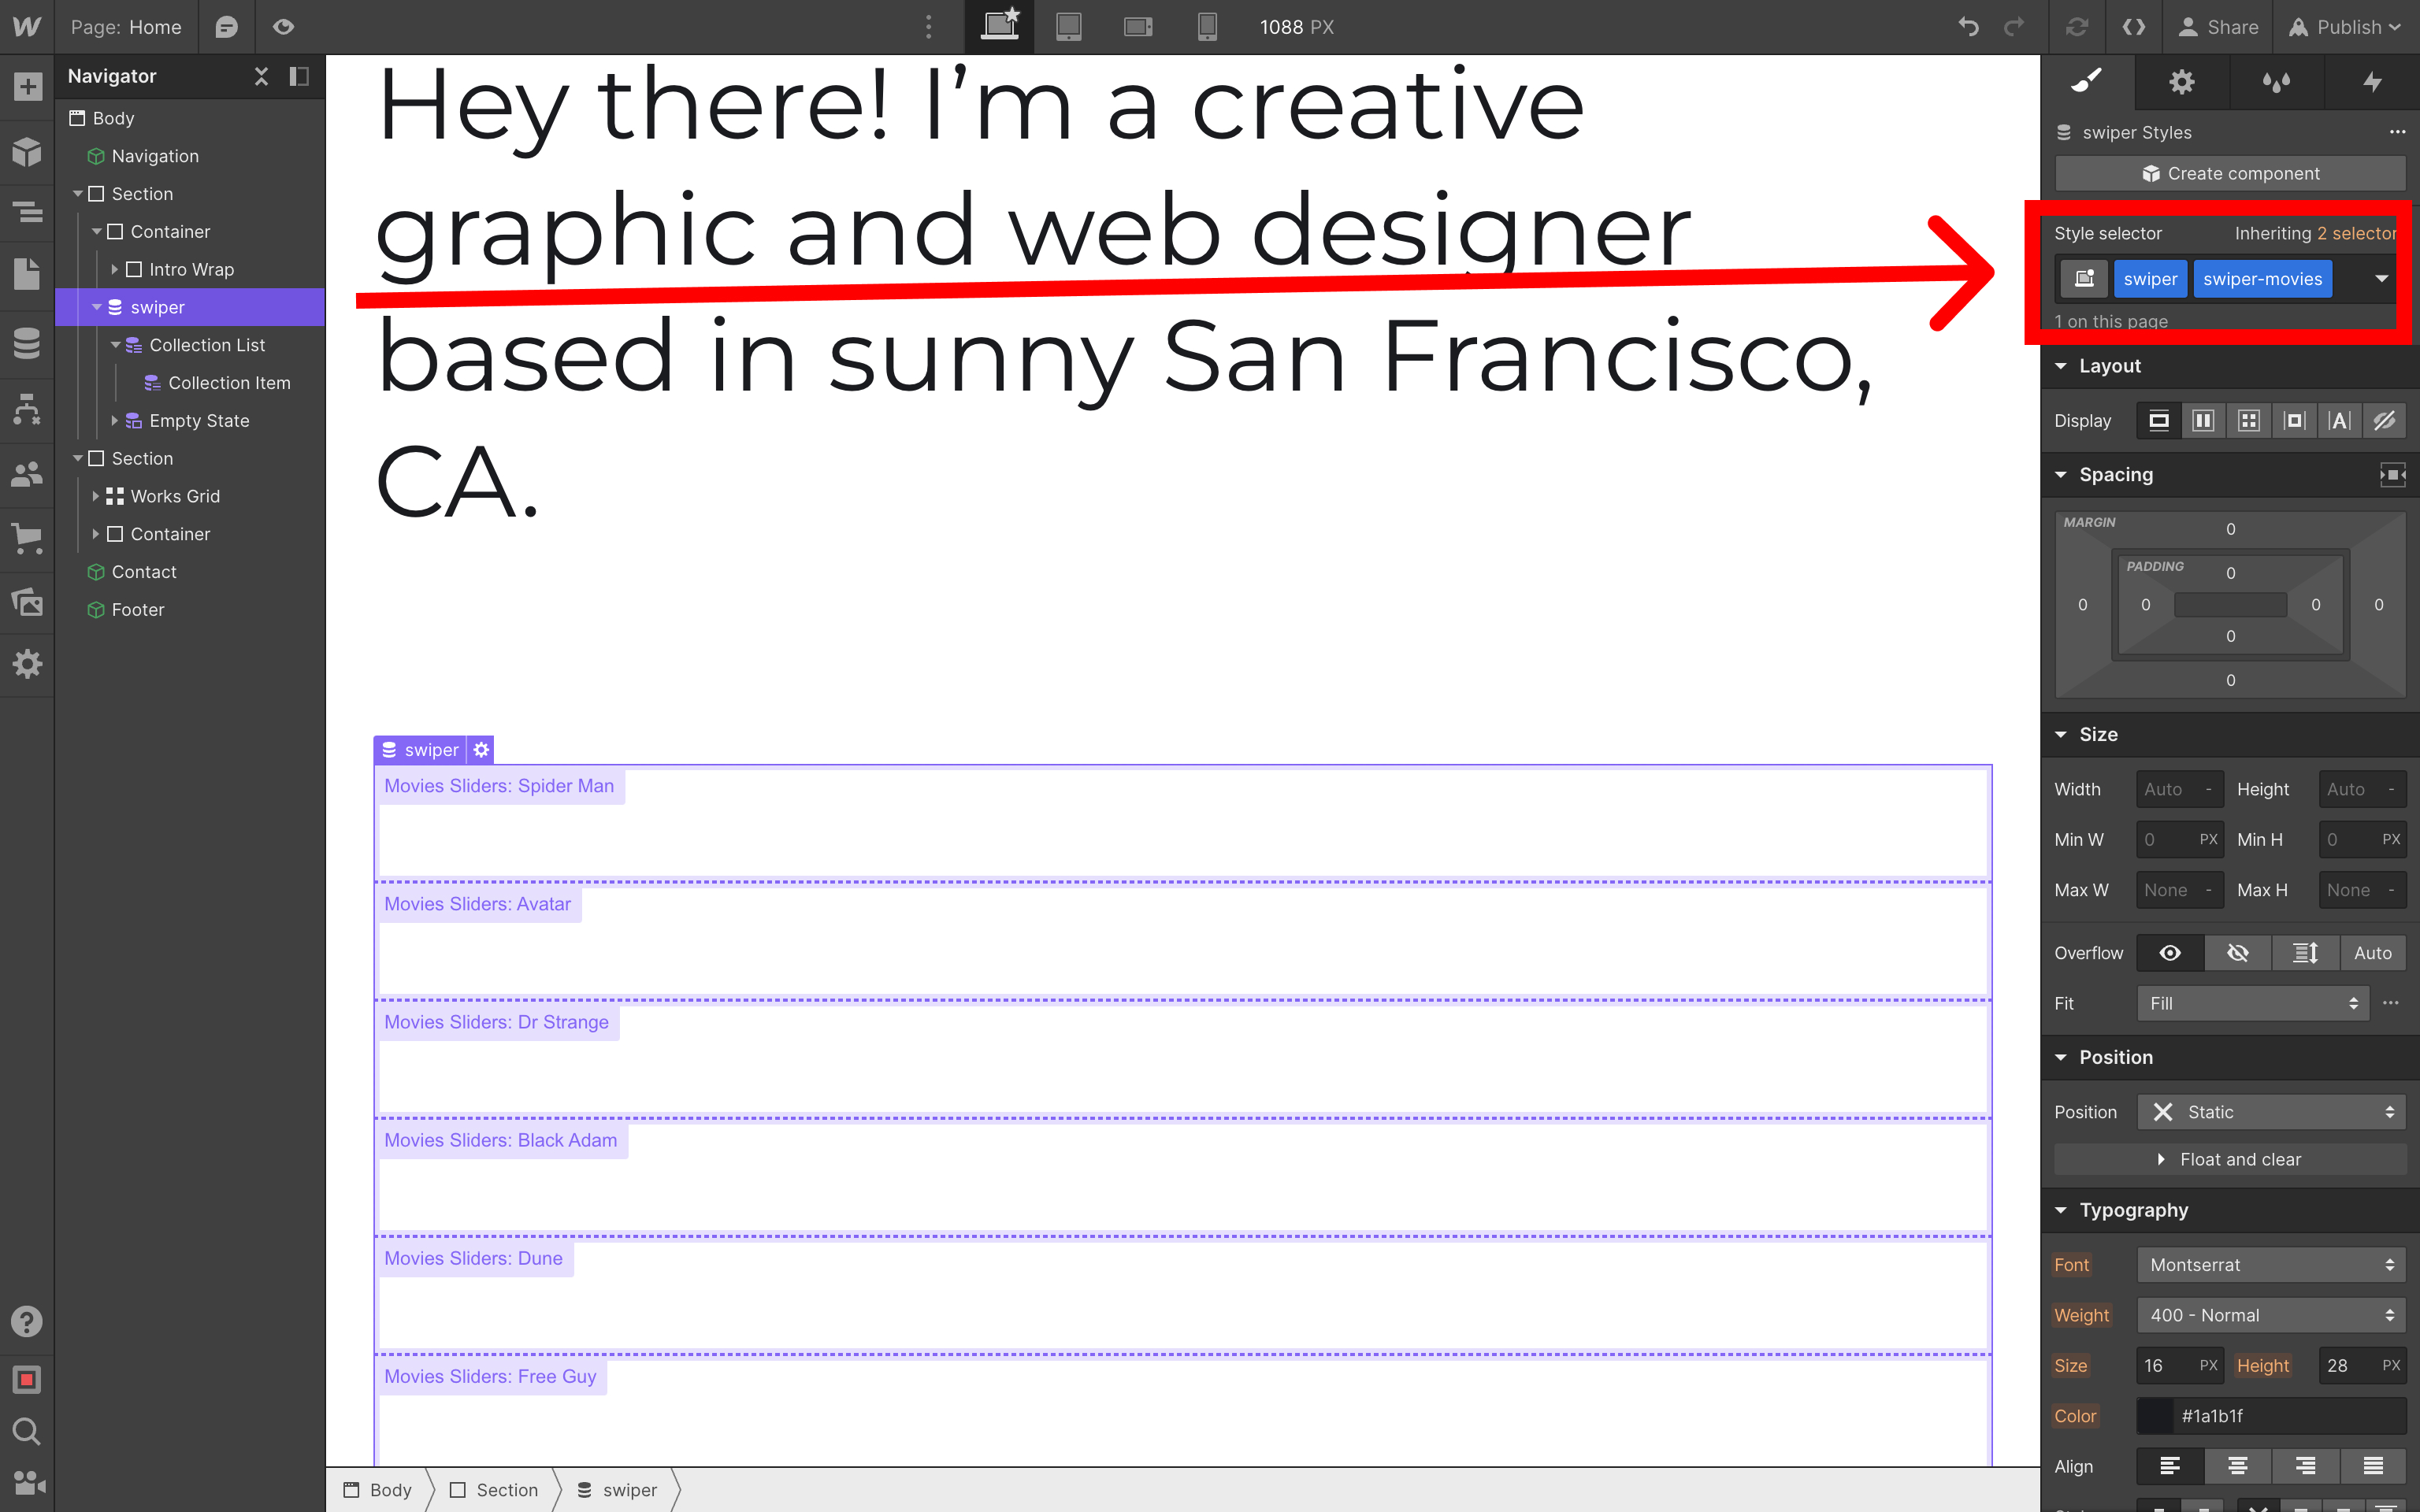
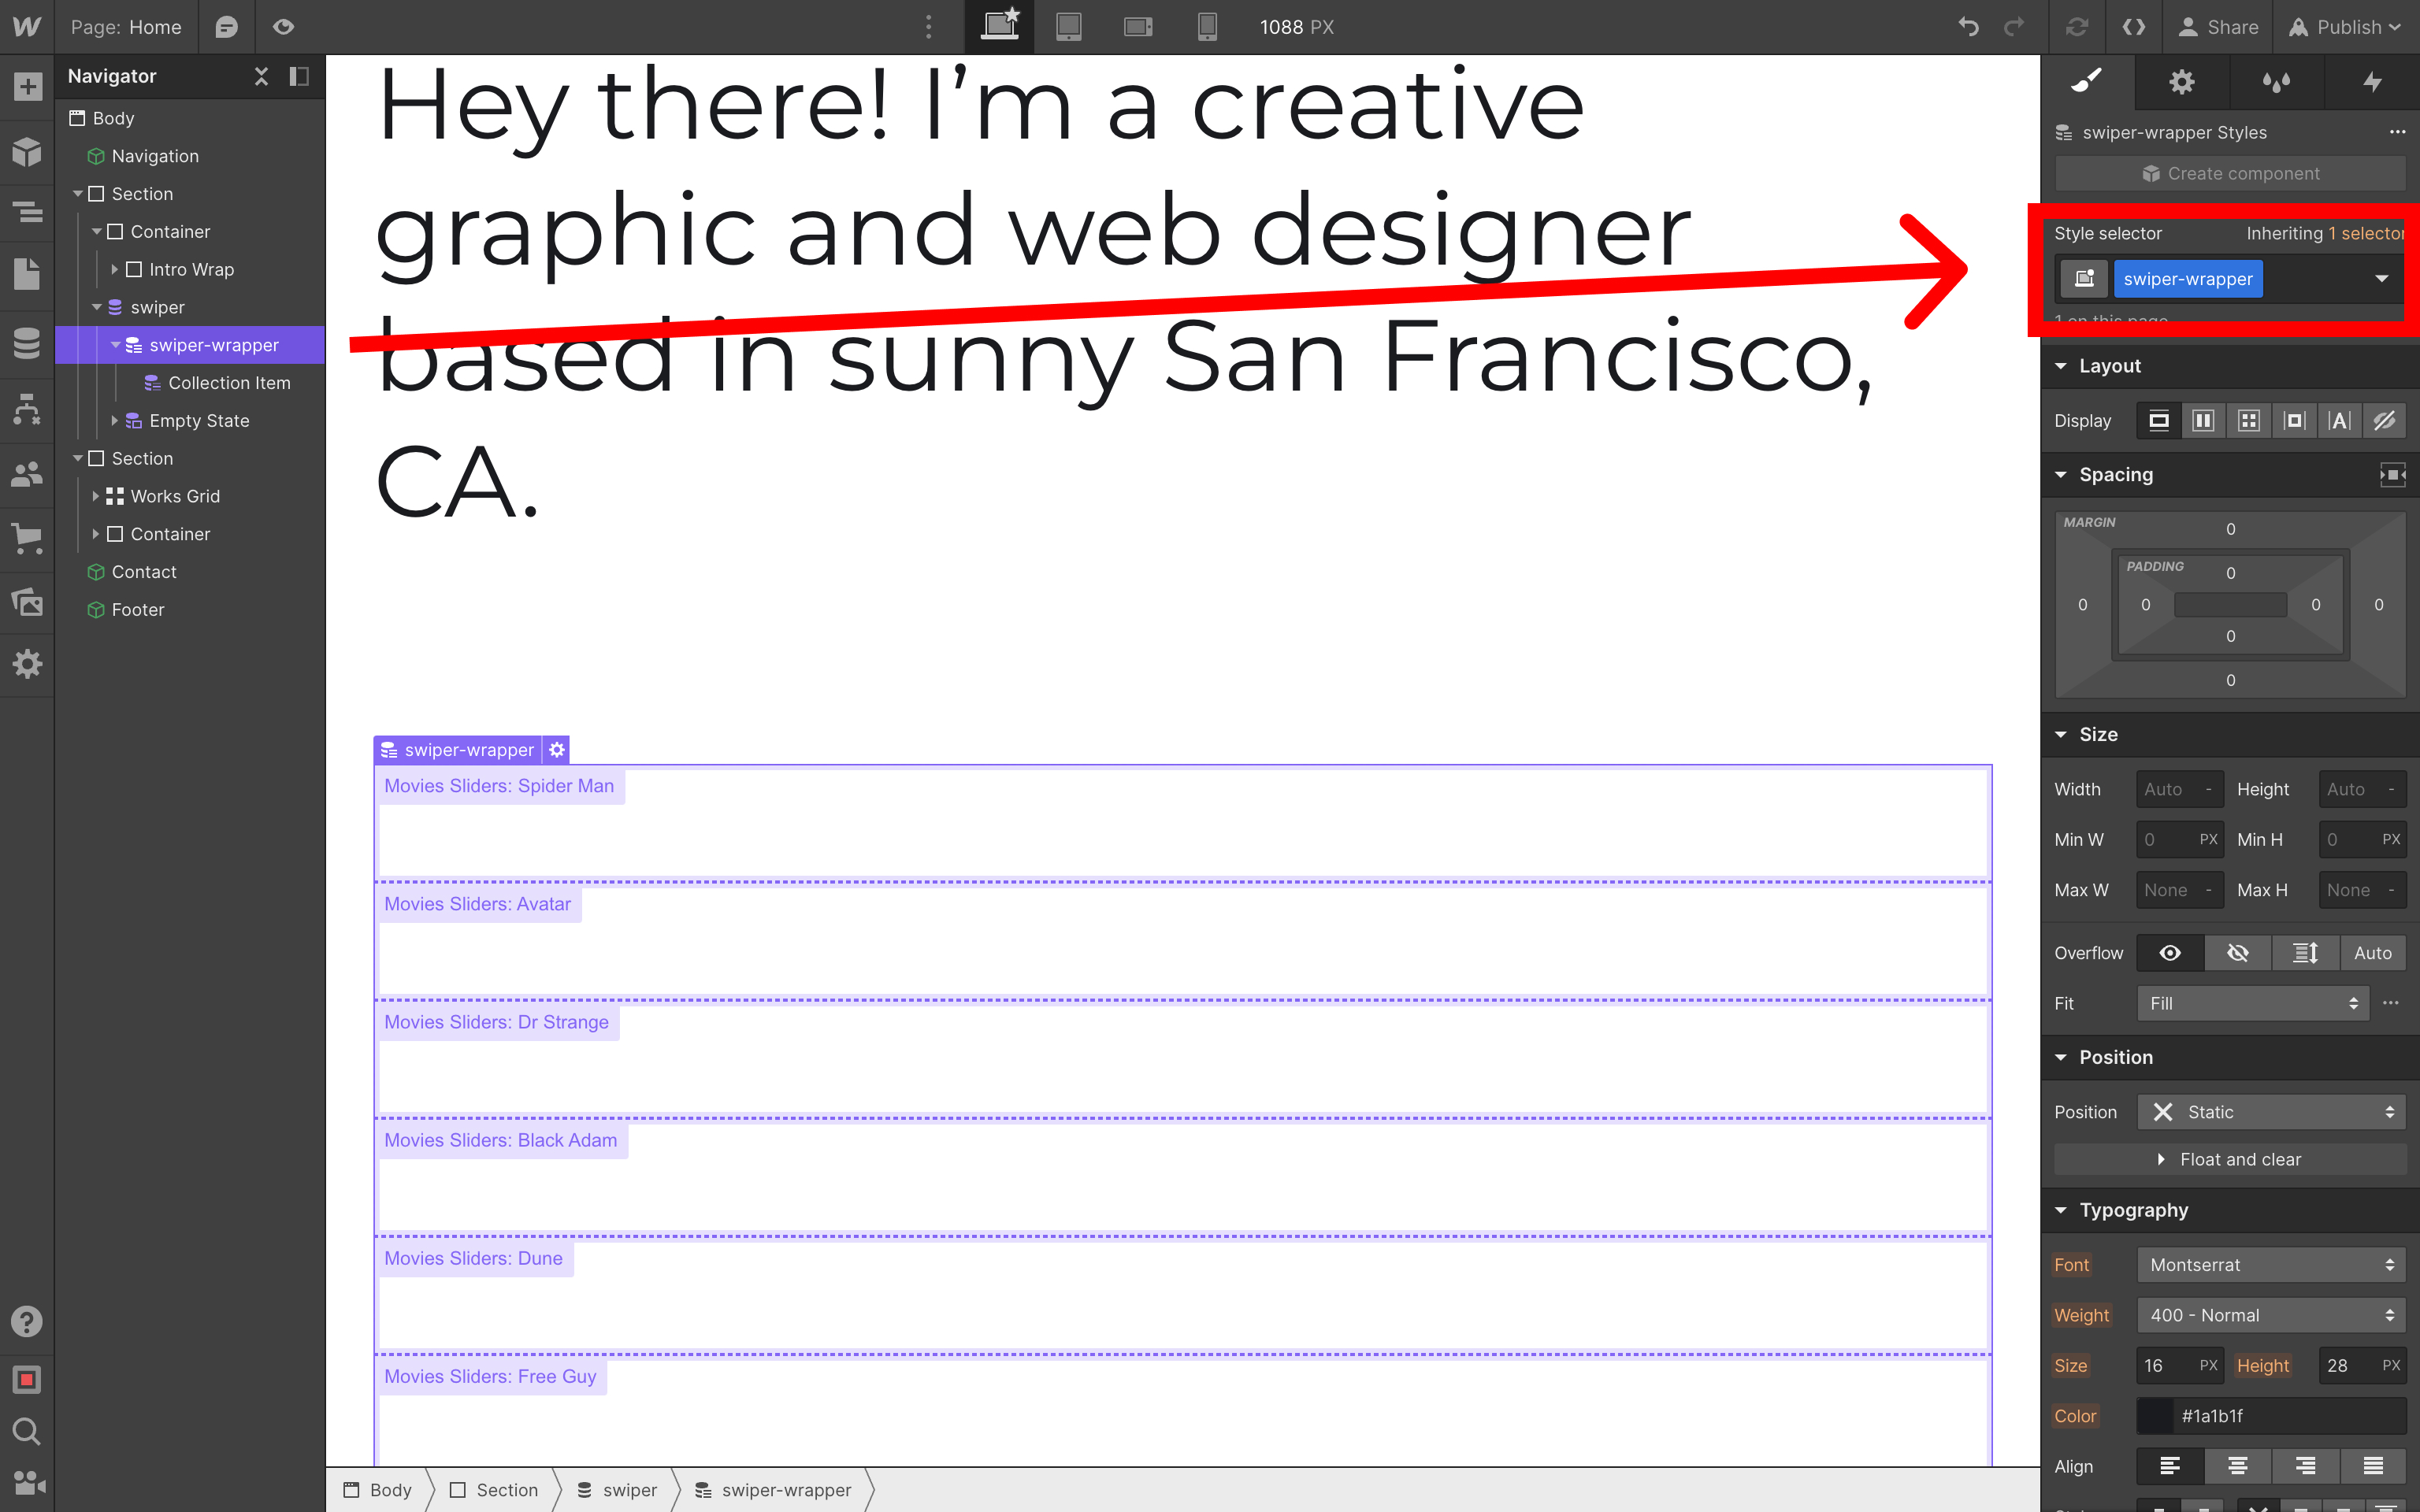
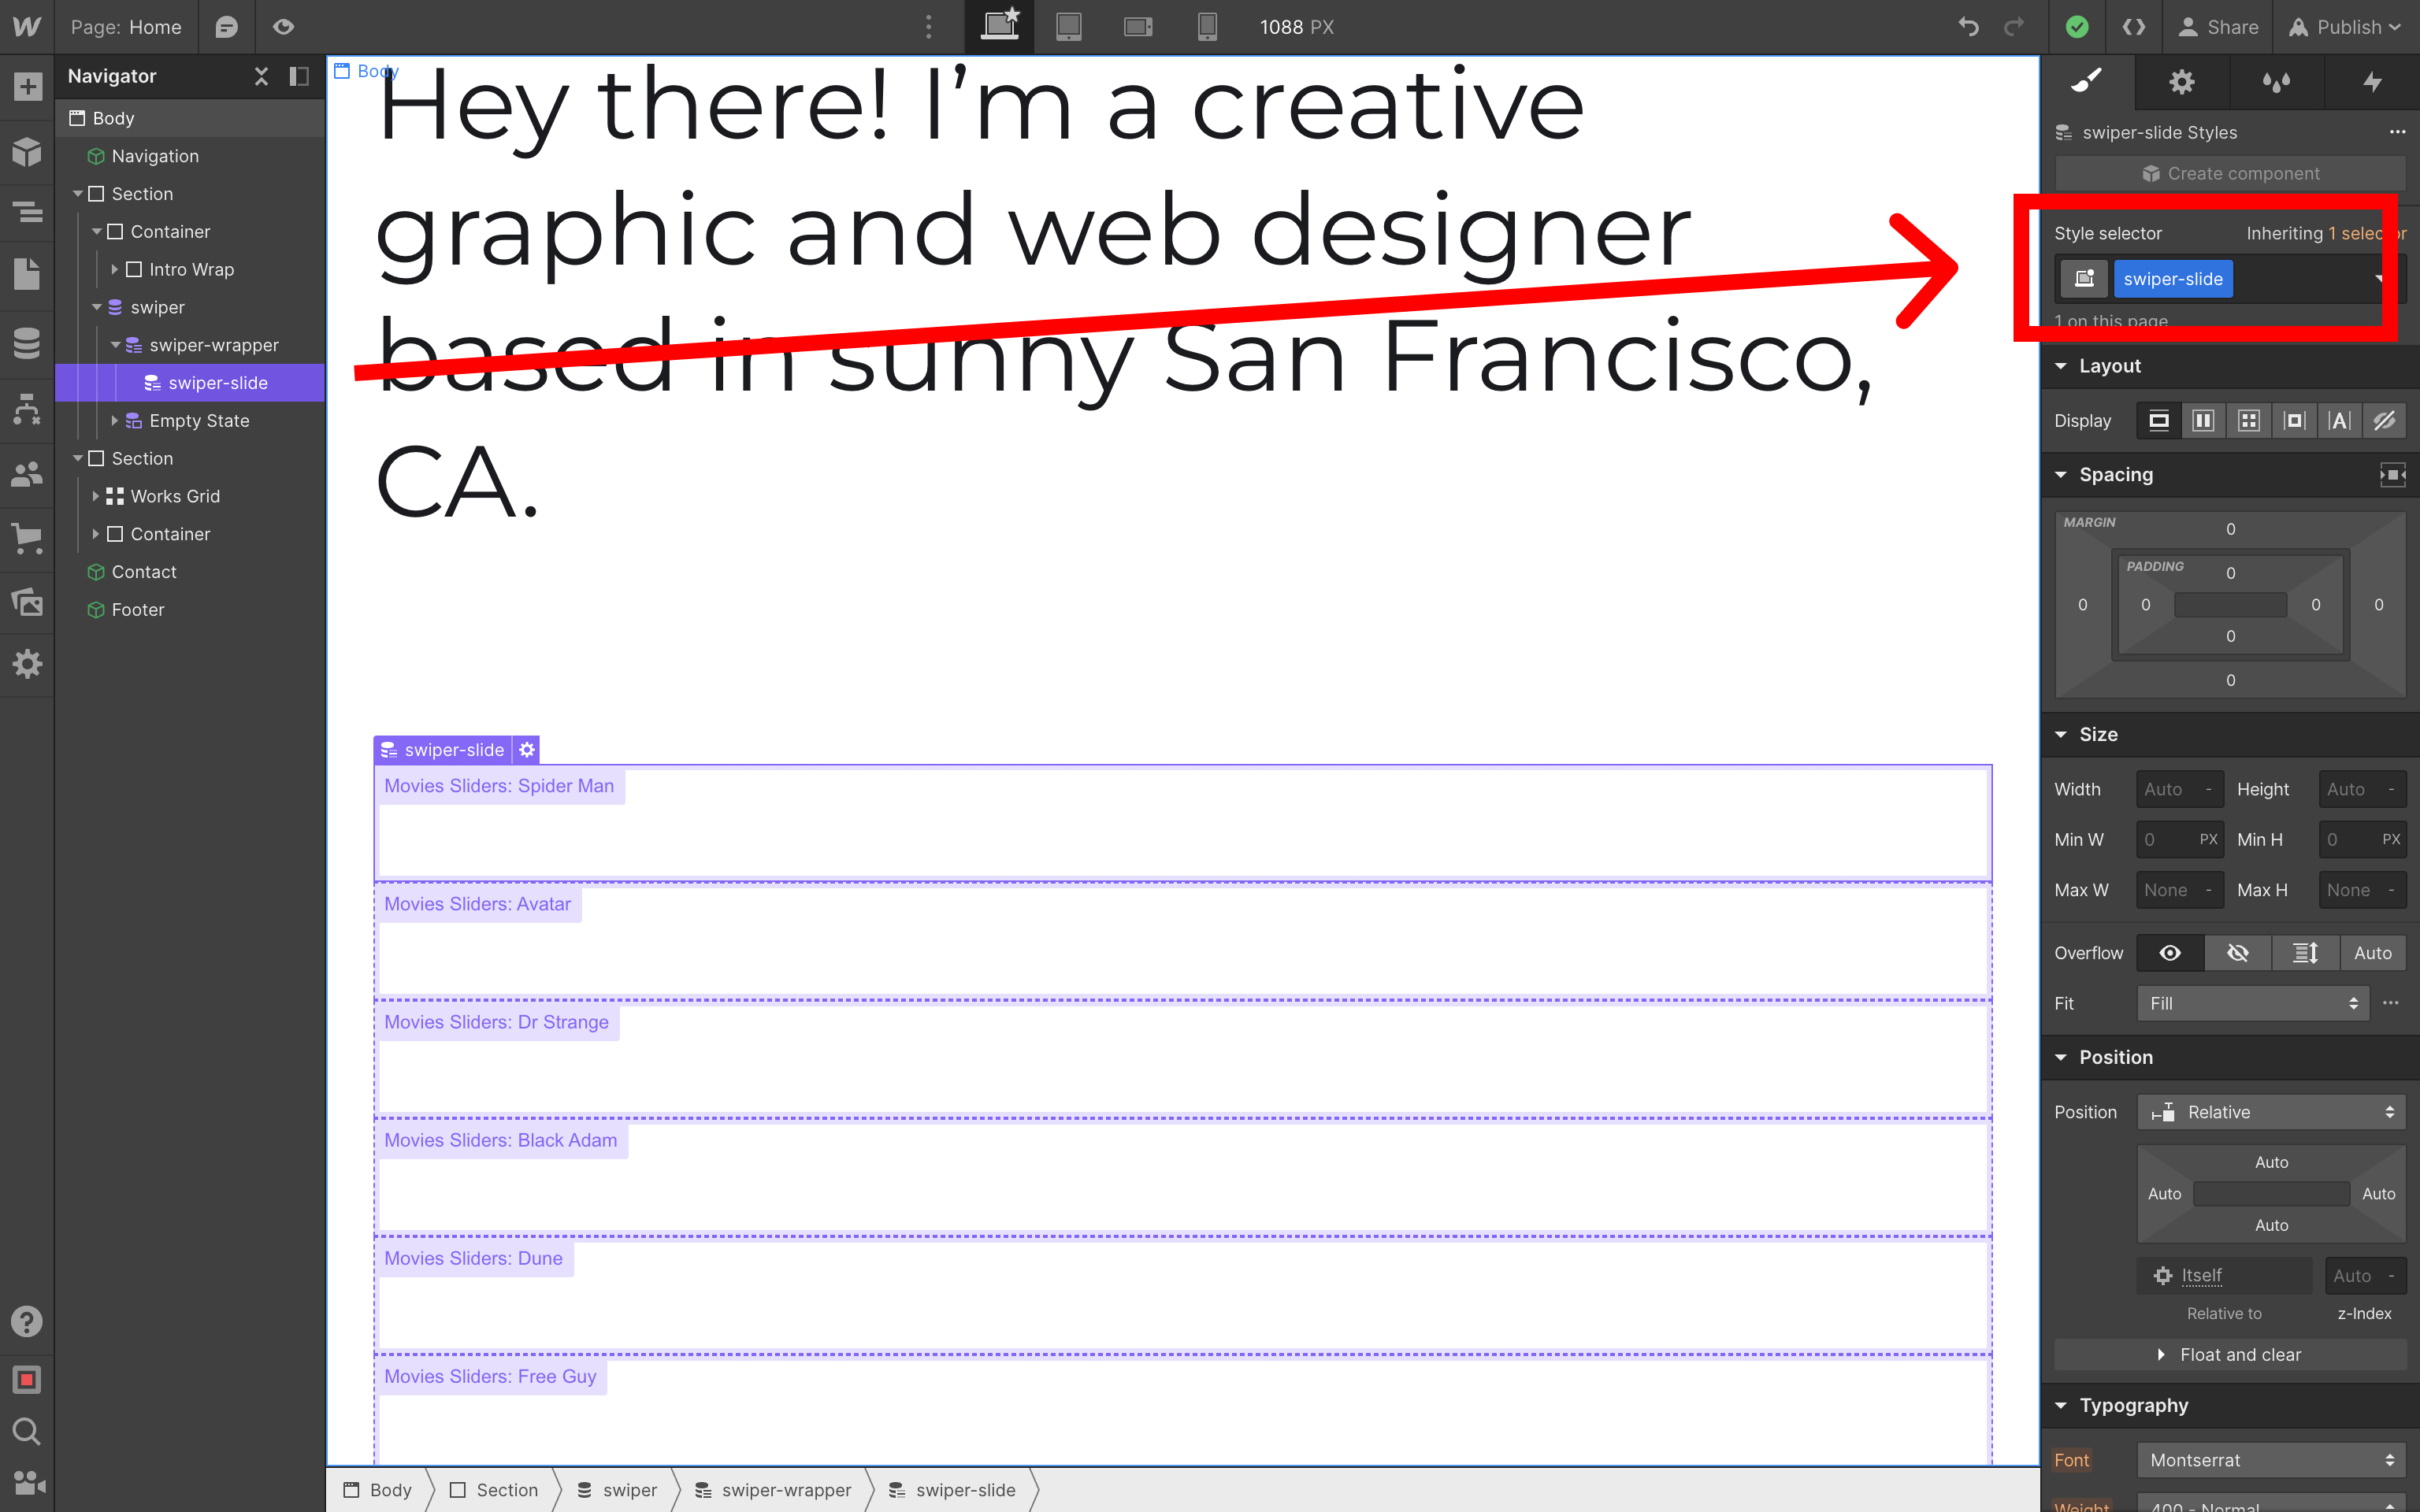
Now, we need to add classes to Collection List Wrapper, Collection List and Collection Item to match Swiper's required layout:
Collection List Wrapper->.swiper.swiper-movies(use extra classswiper-movieshere for initialization)Collection List->.swiper-wrapperCollection Item->.swiper-slide
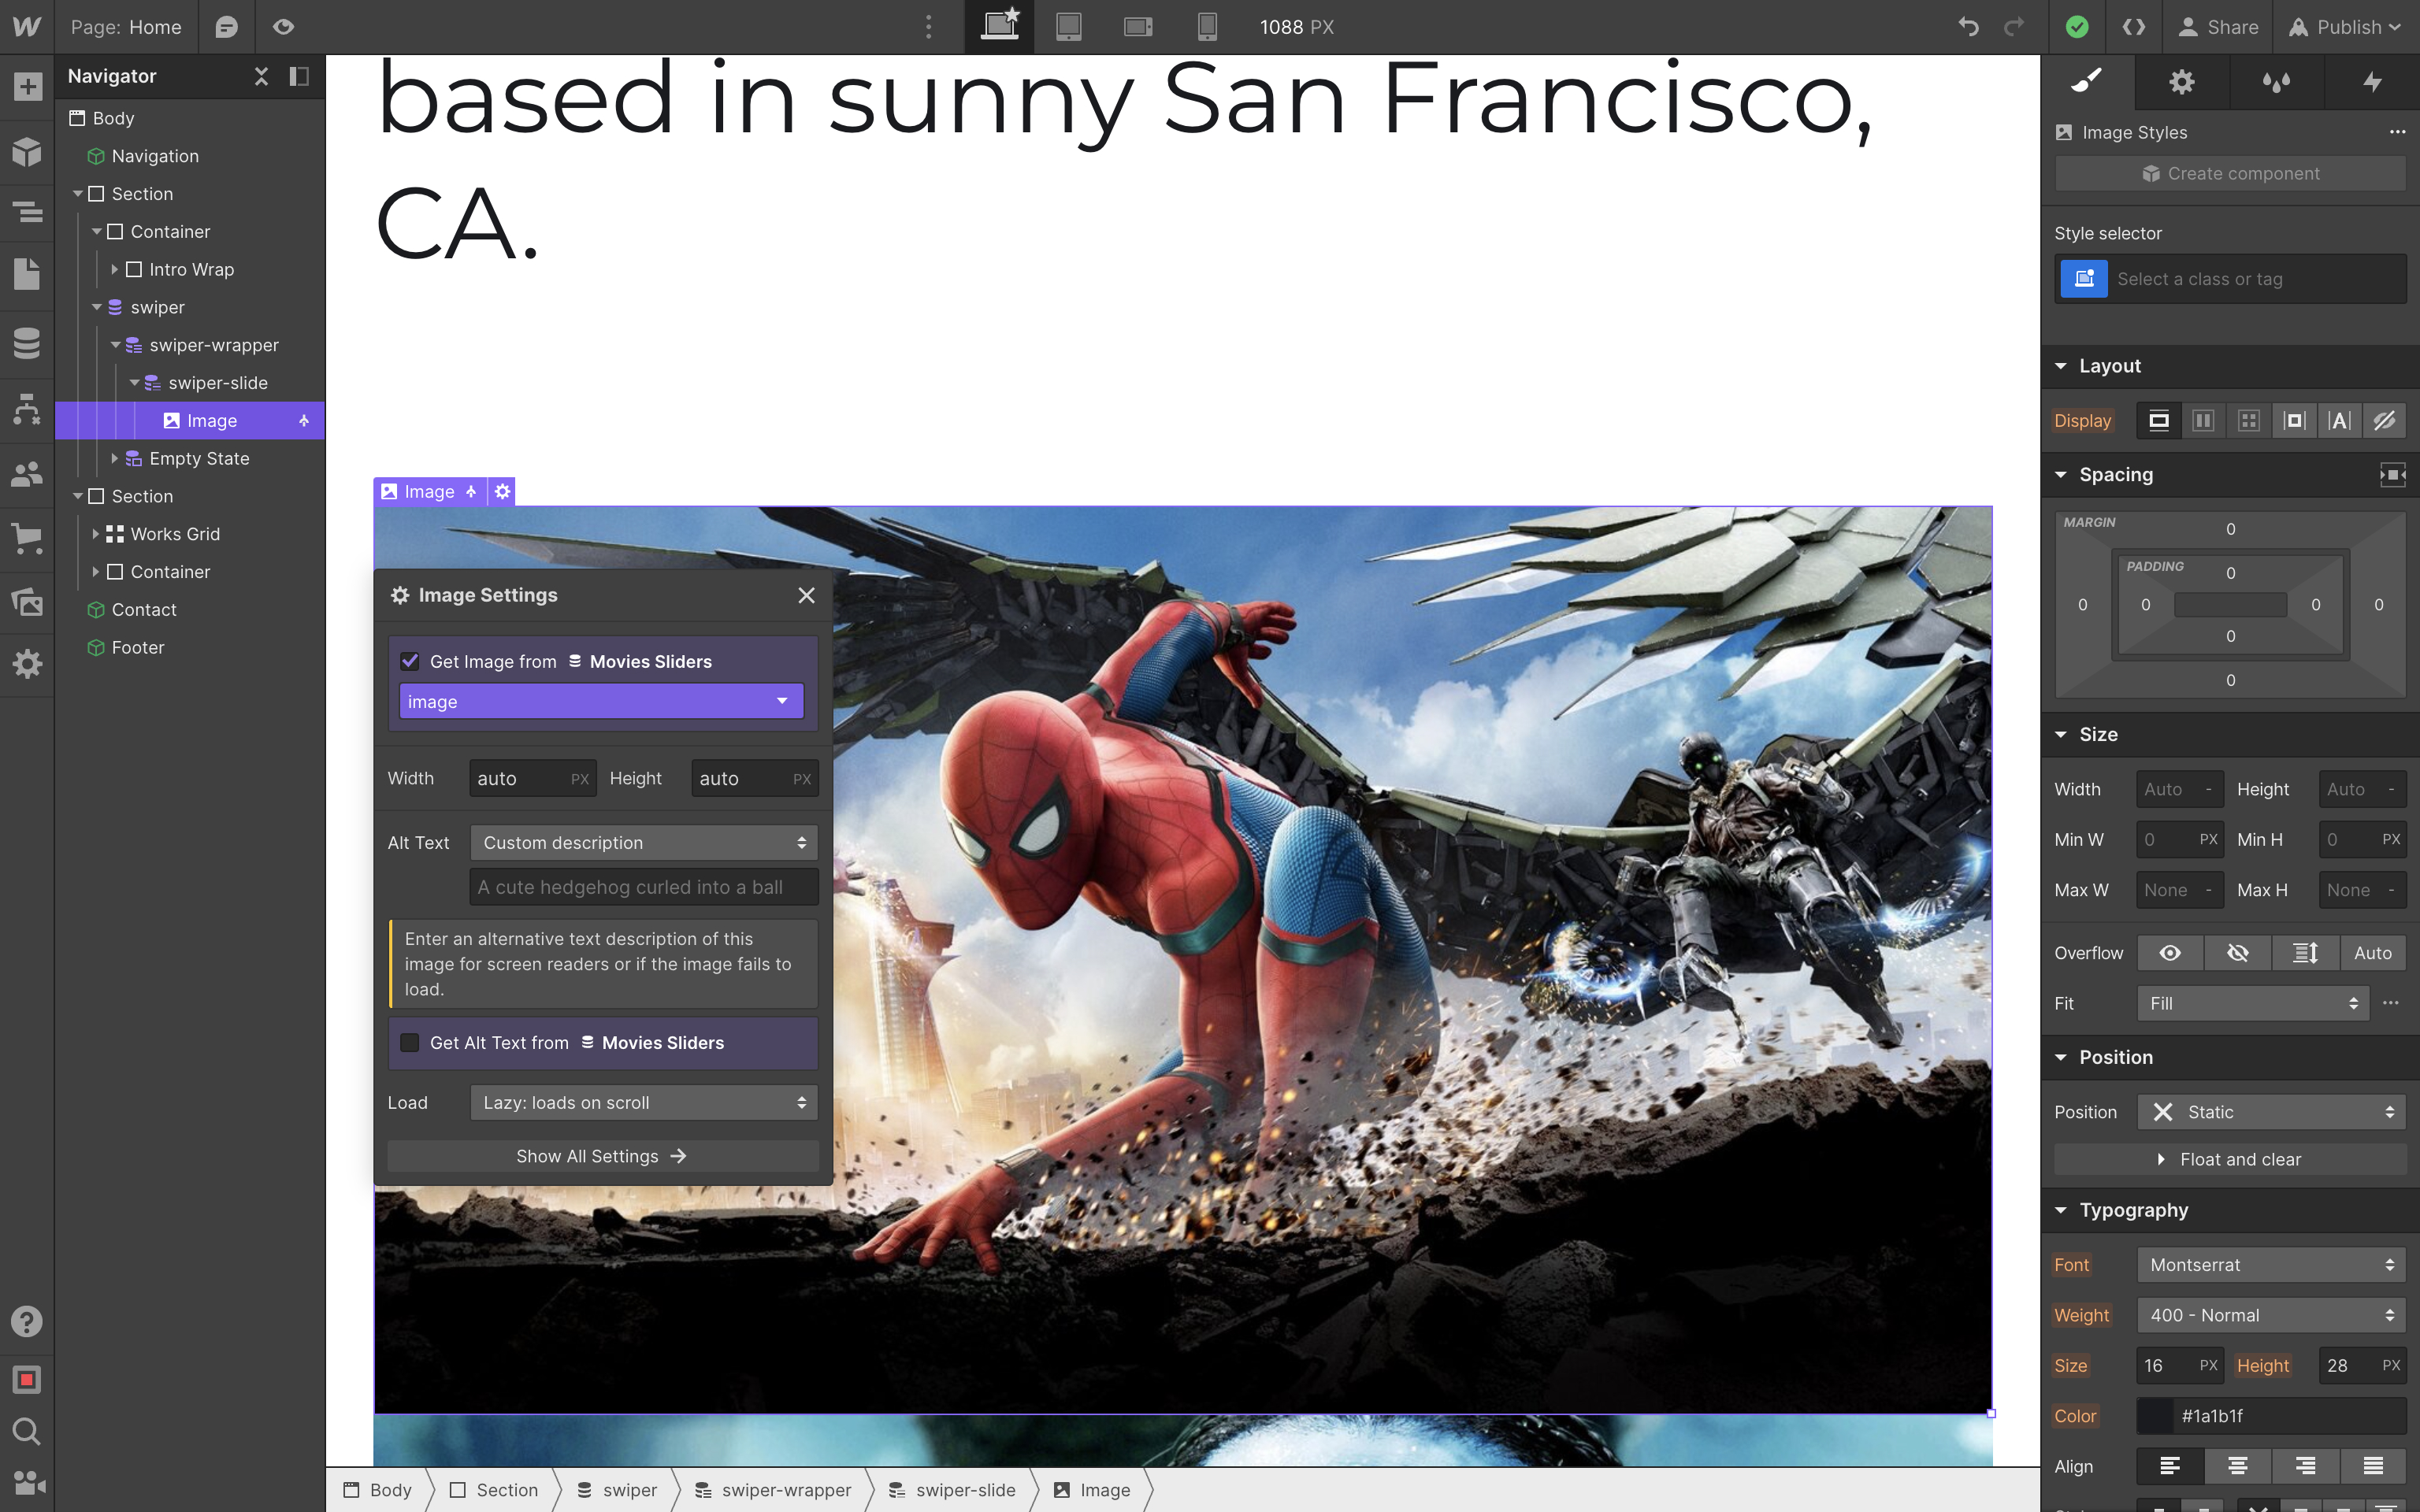
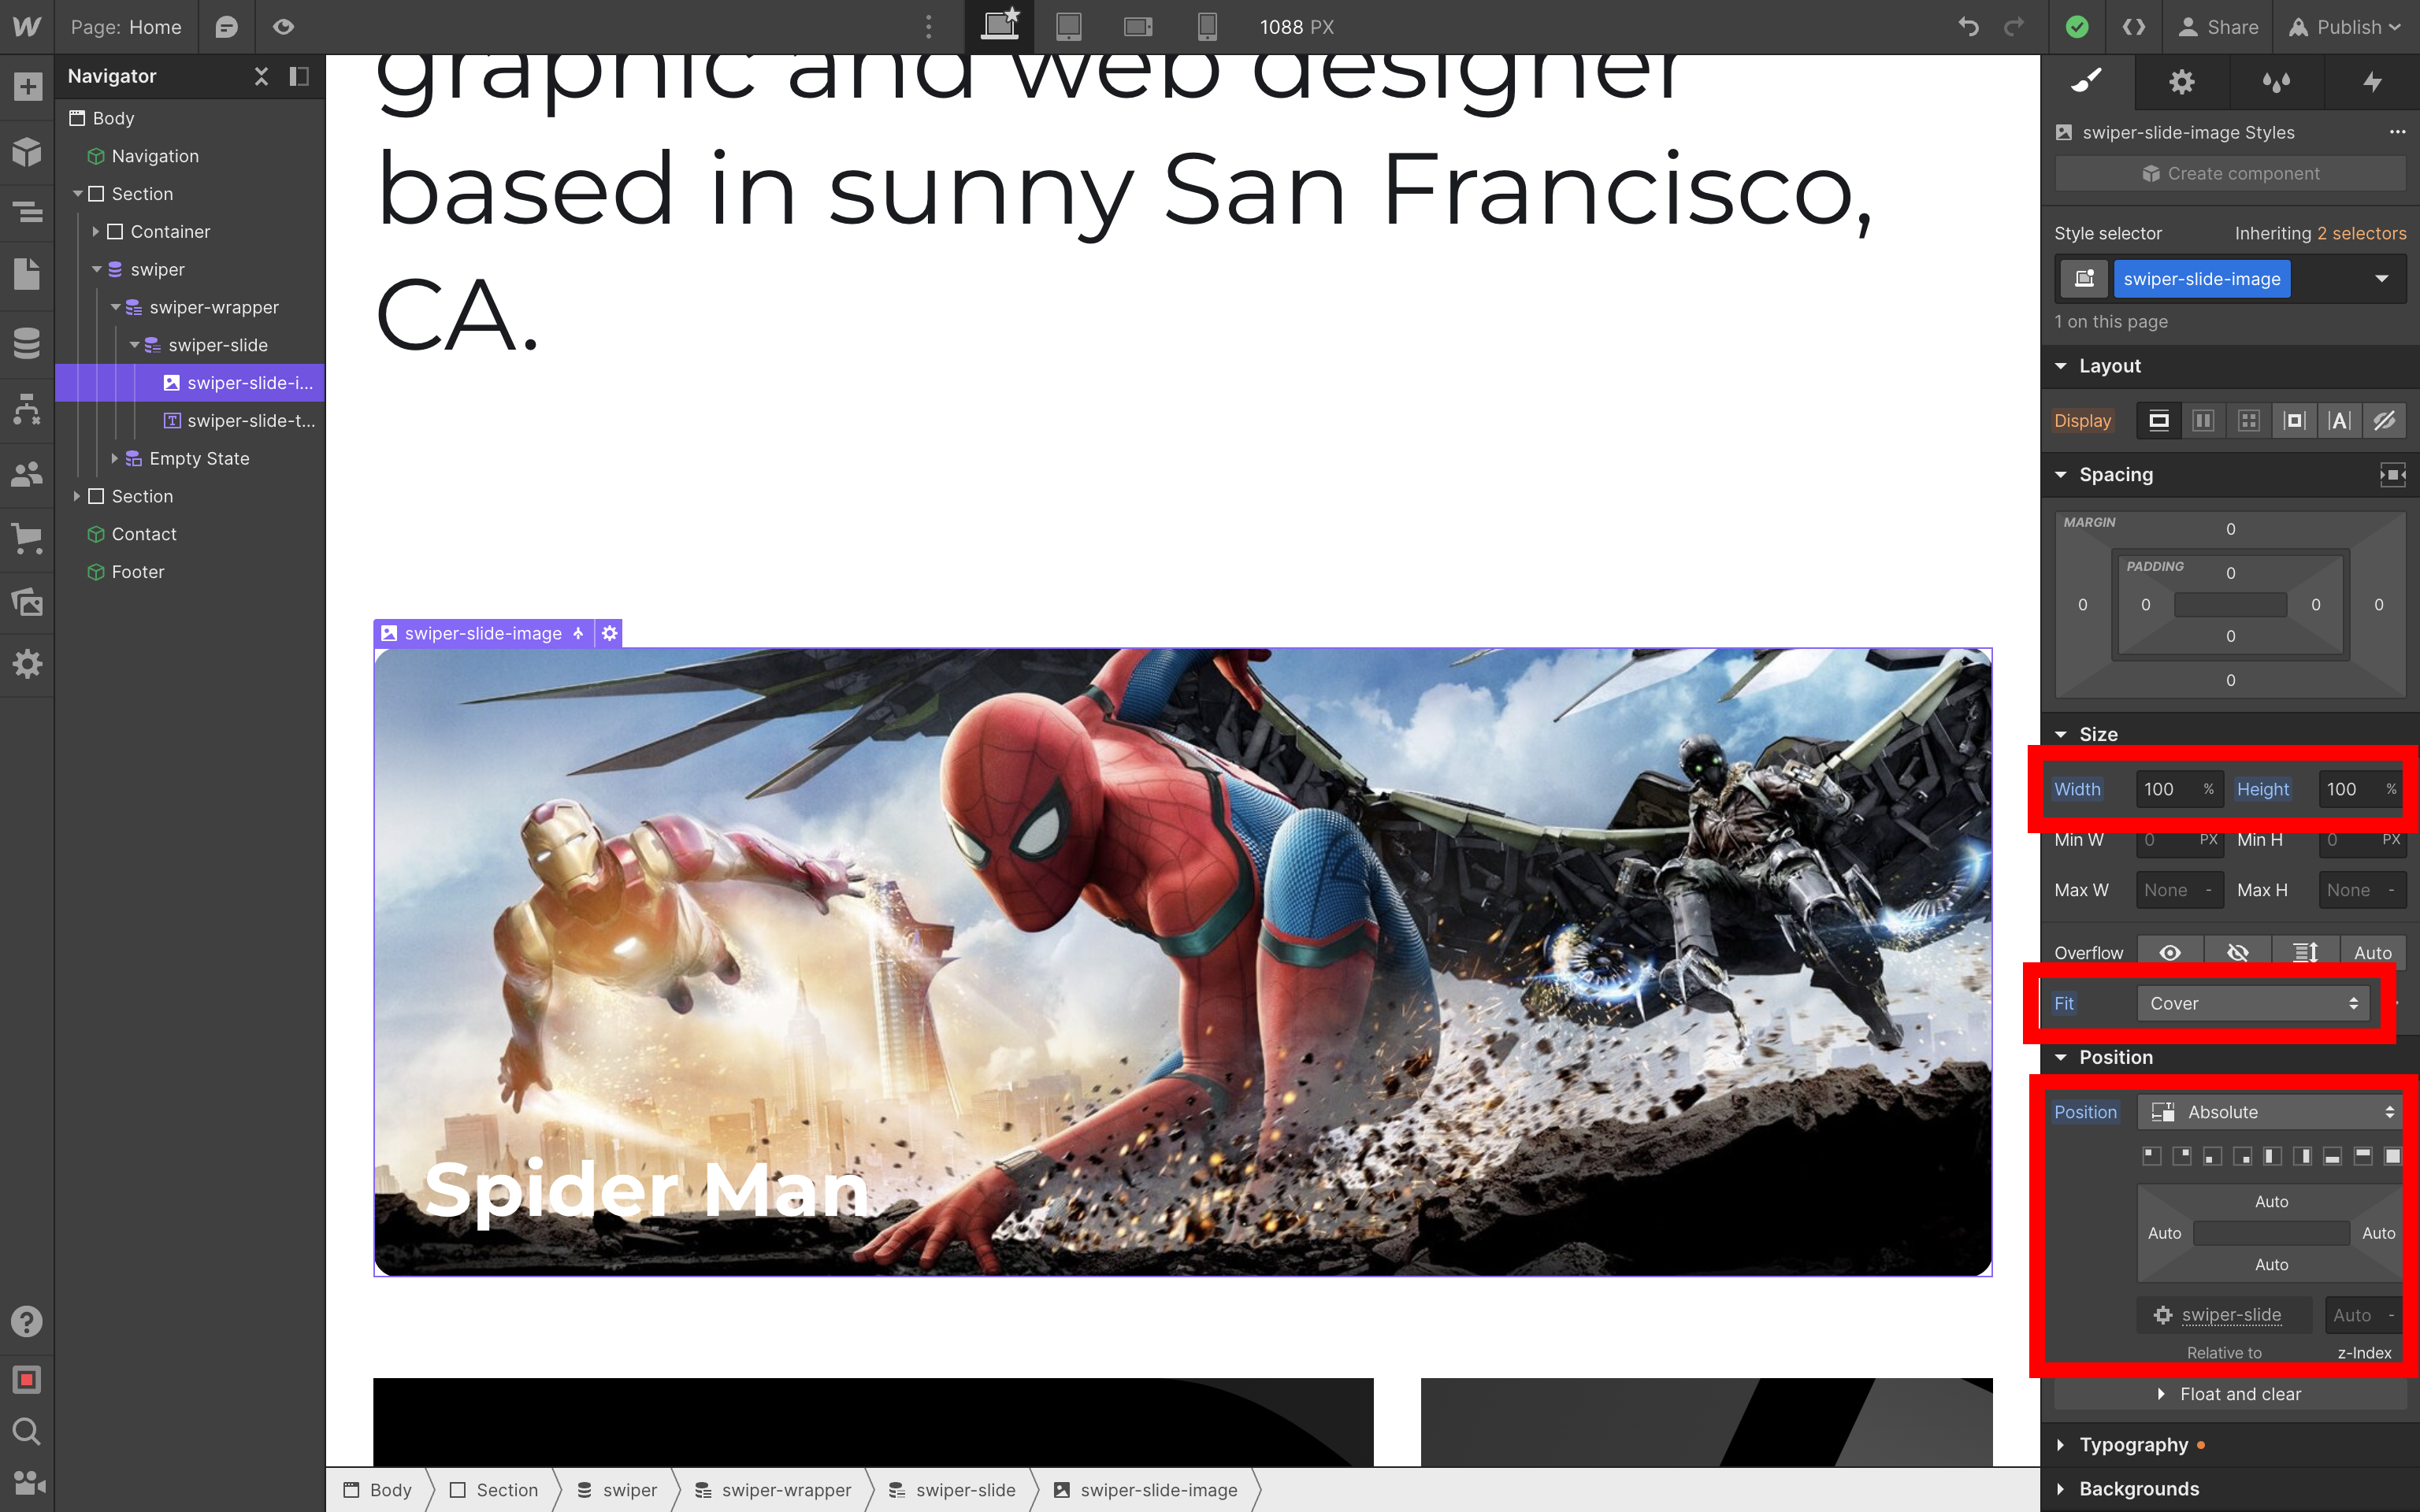
Slide Image
Once we have set required layout for slides, let's add Image element to the slide, check Get image from Movies Sliders and select the image field as image source:
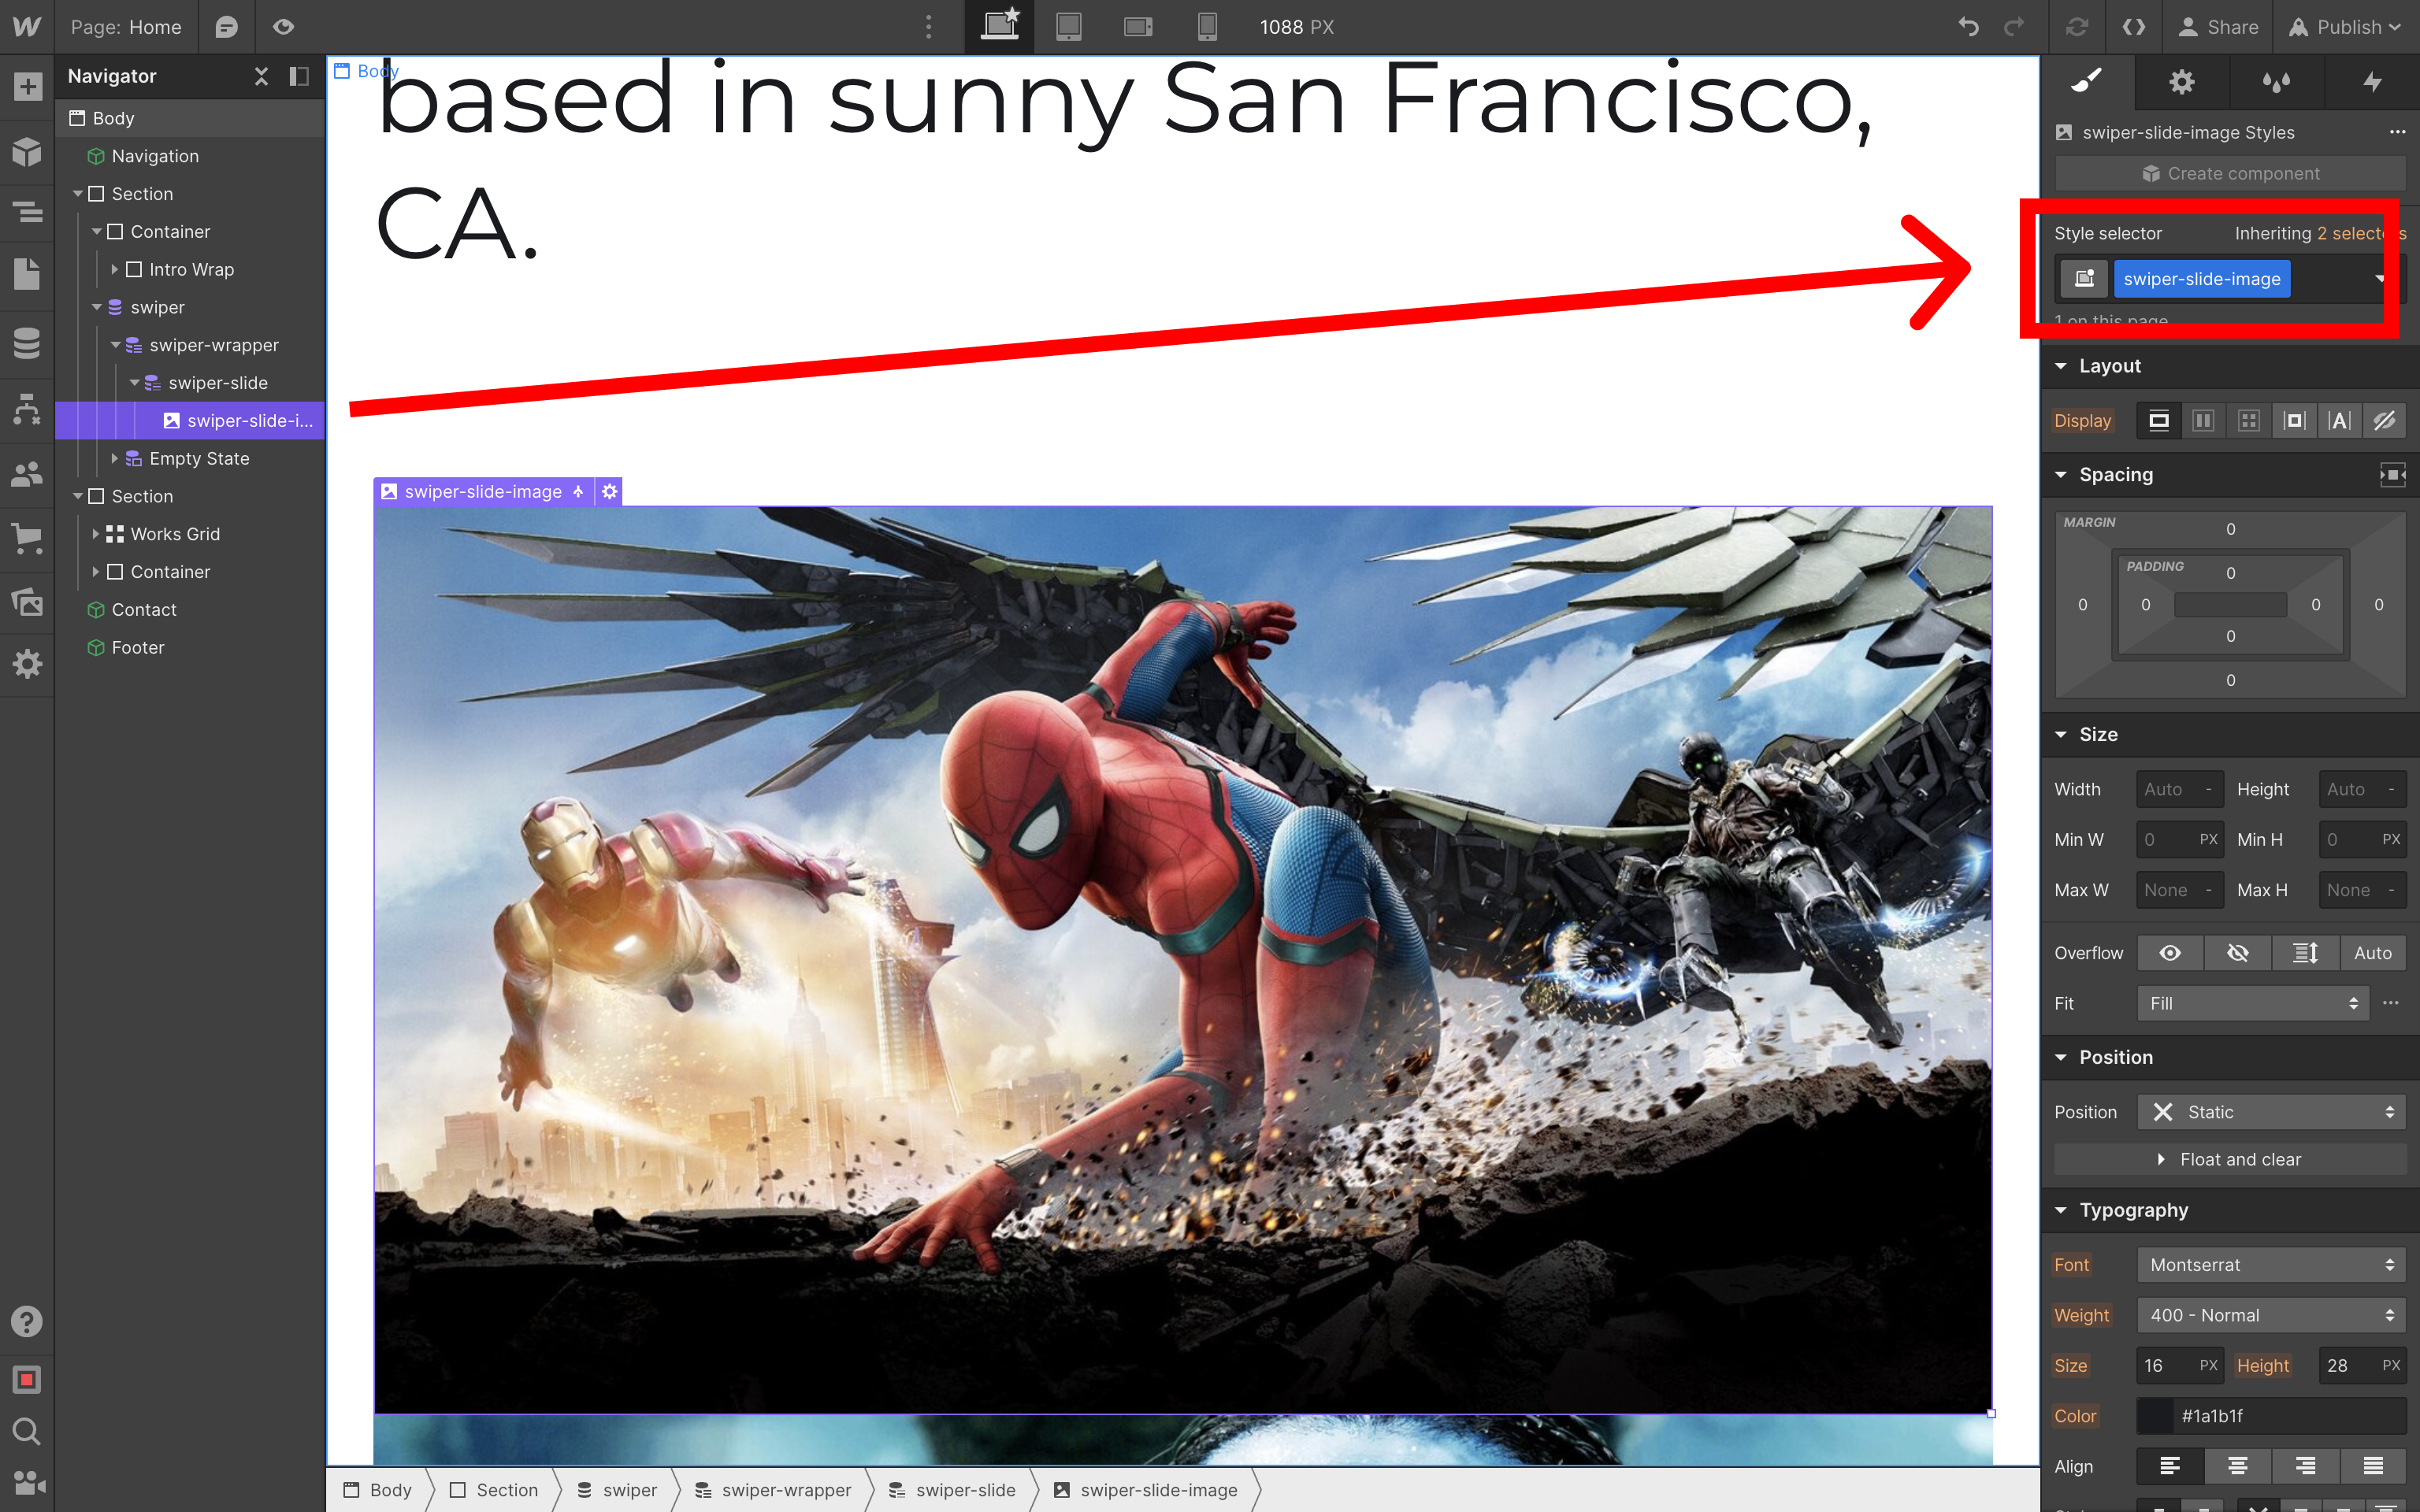
And add swiper-slide-image class to the image:
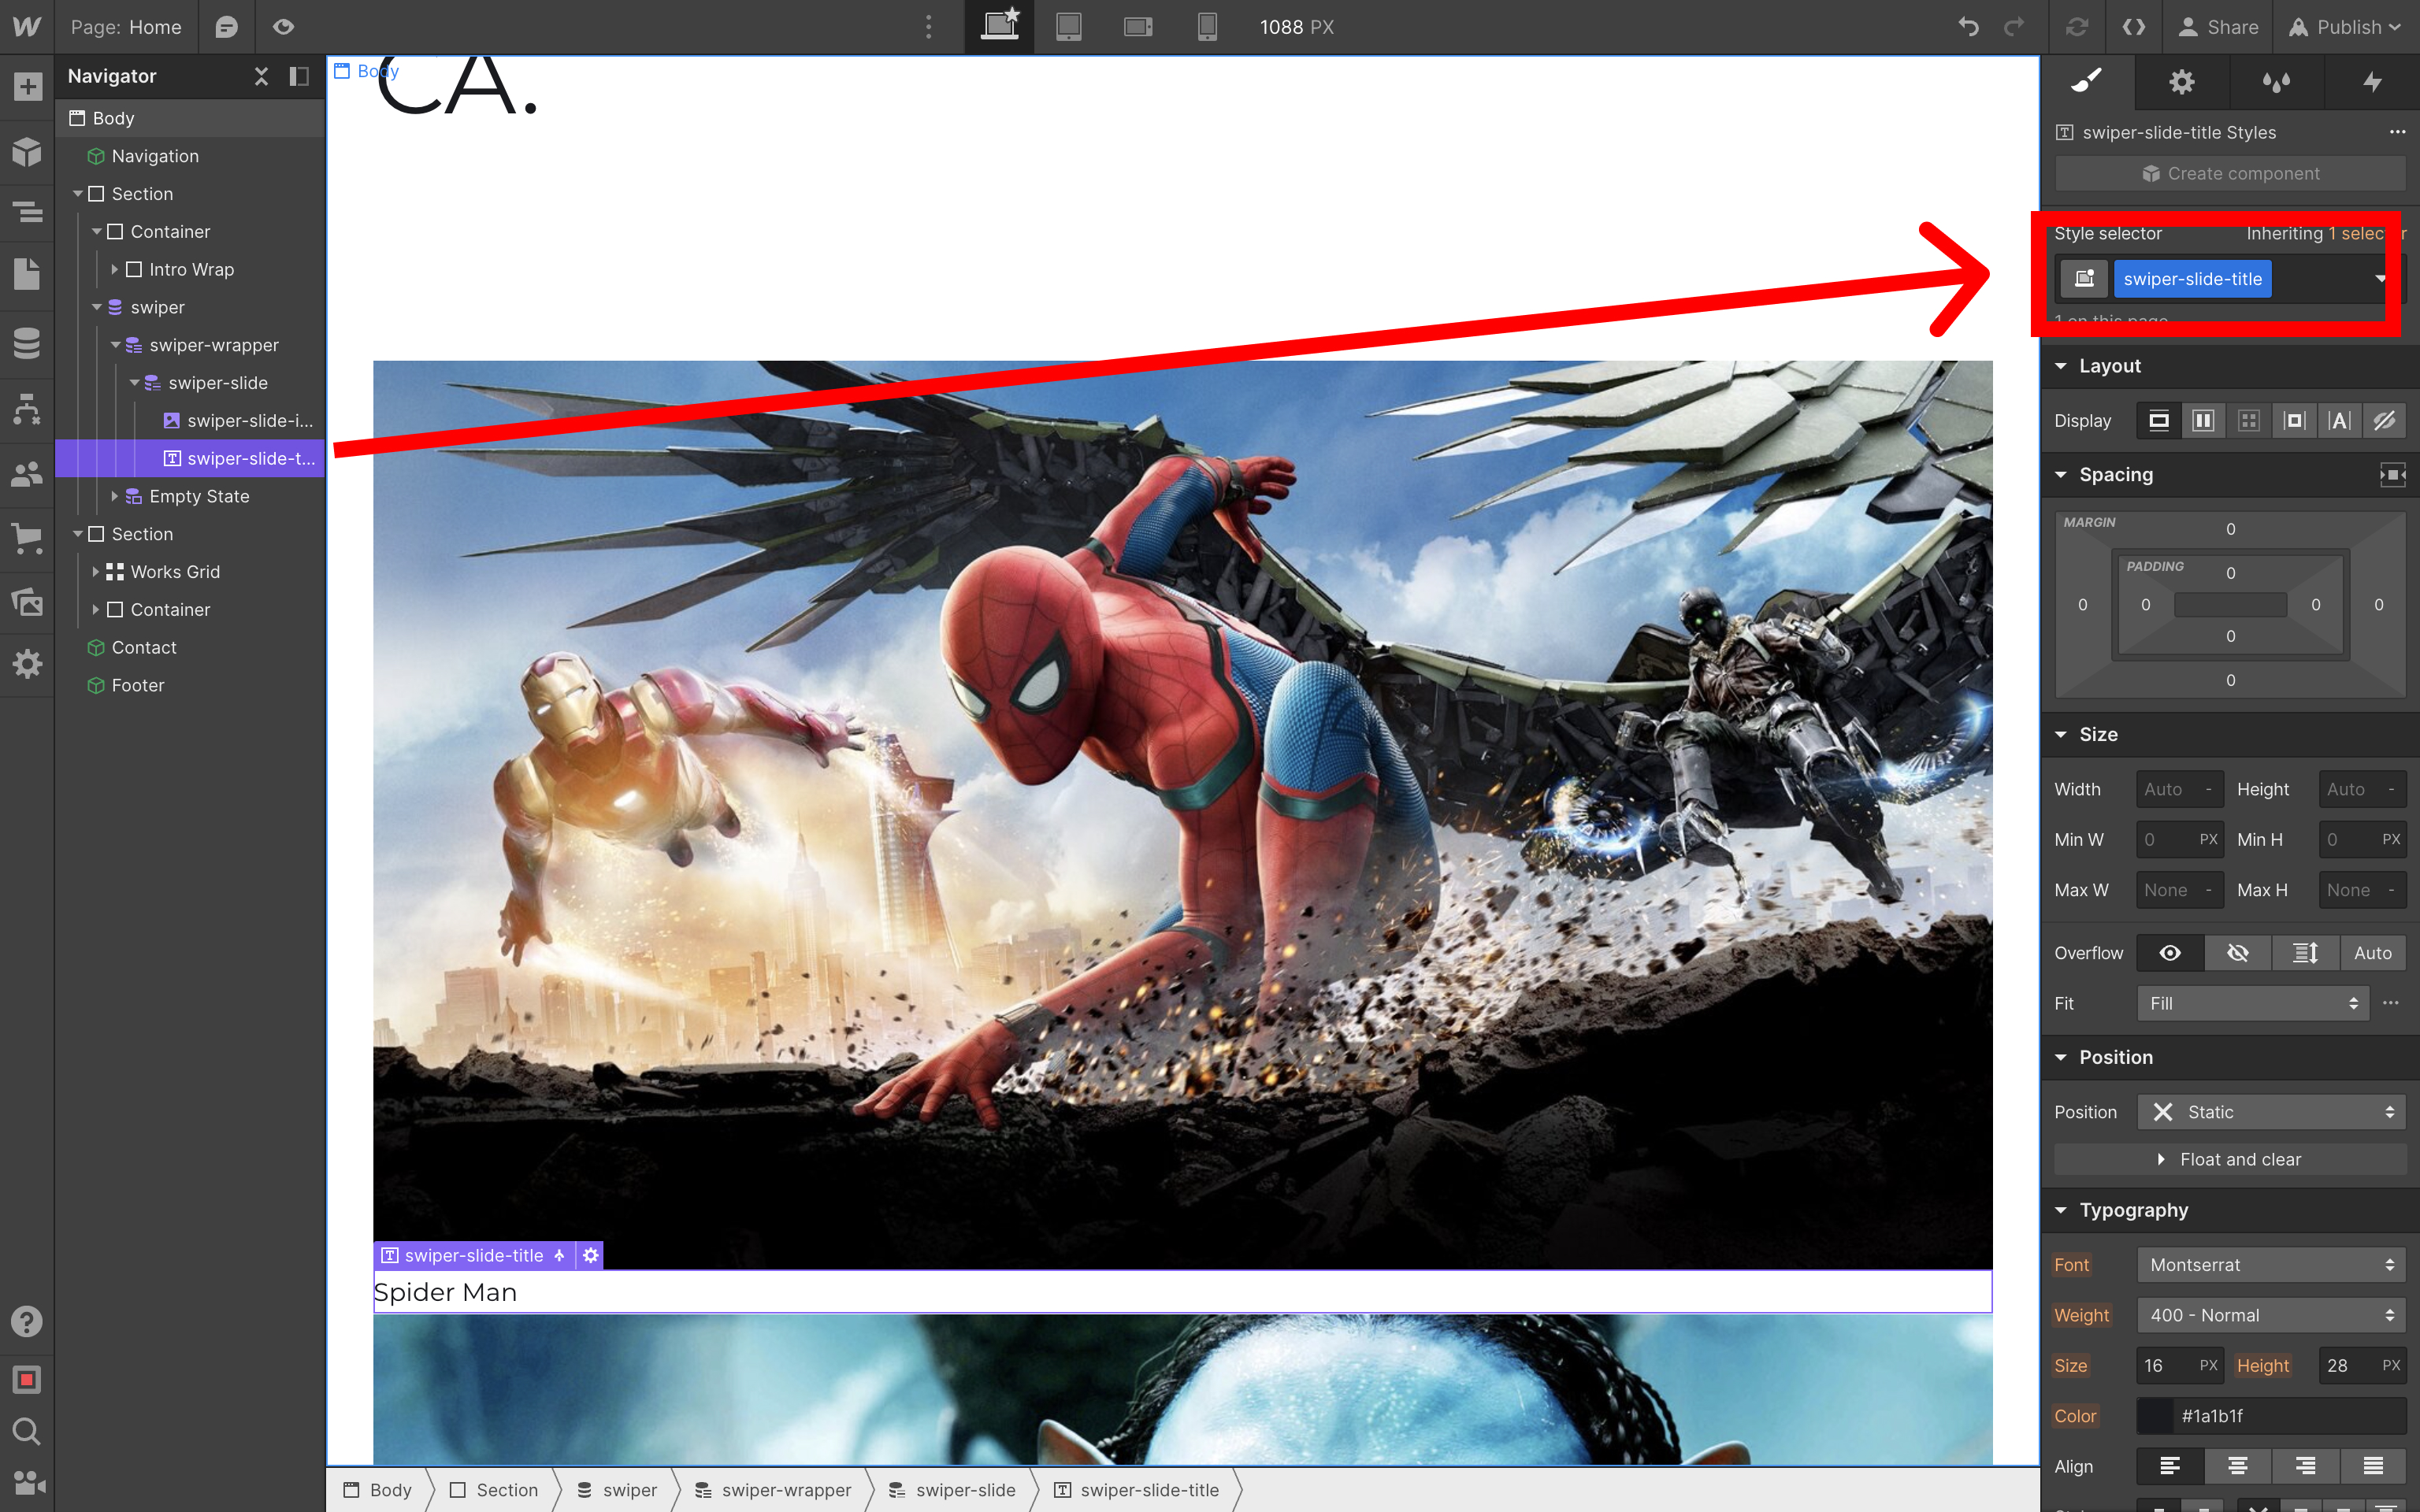
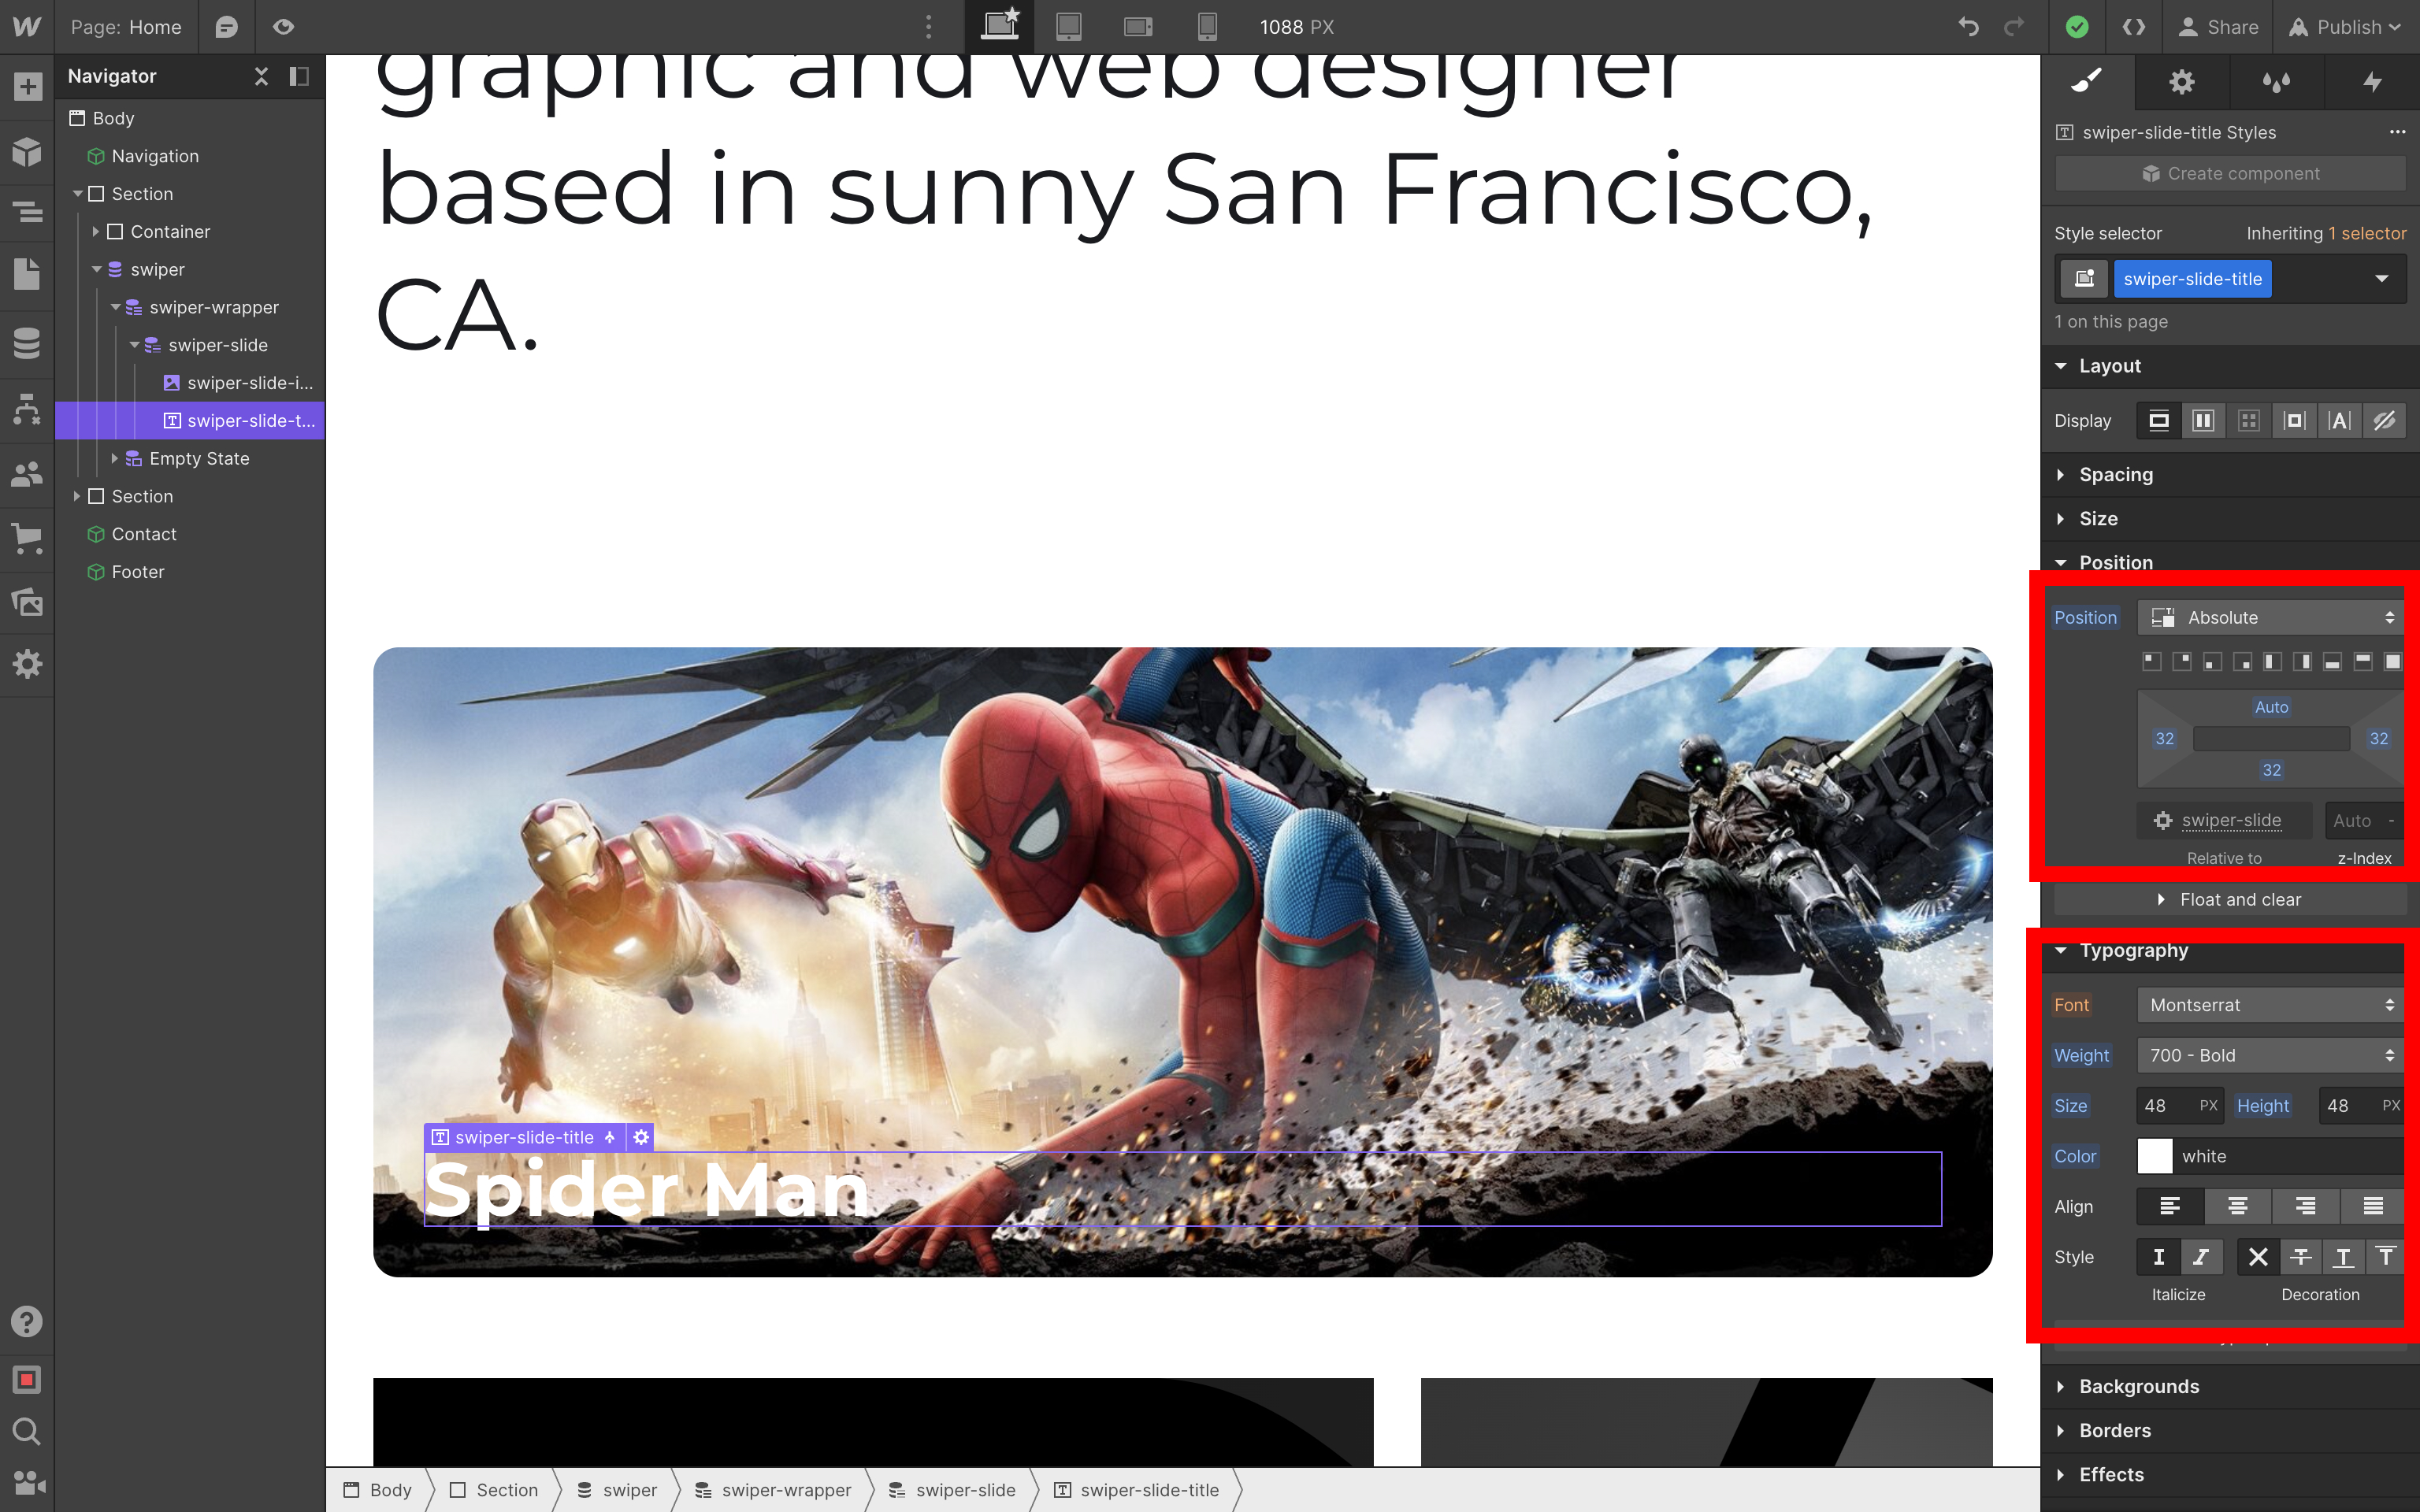
Slide Title
Final thing to setup here is the slide title. Same as with the image, add Text element to the slide, check Get text from Movies Sliders checkbox and select the title field:
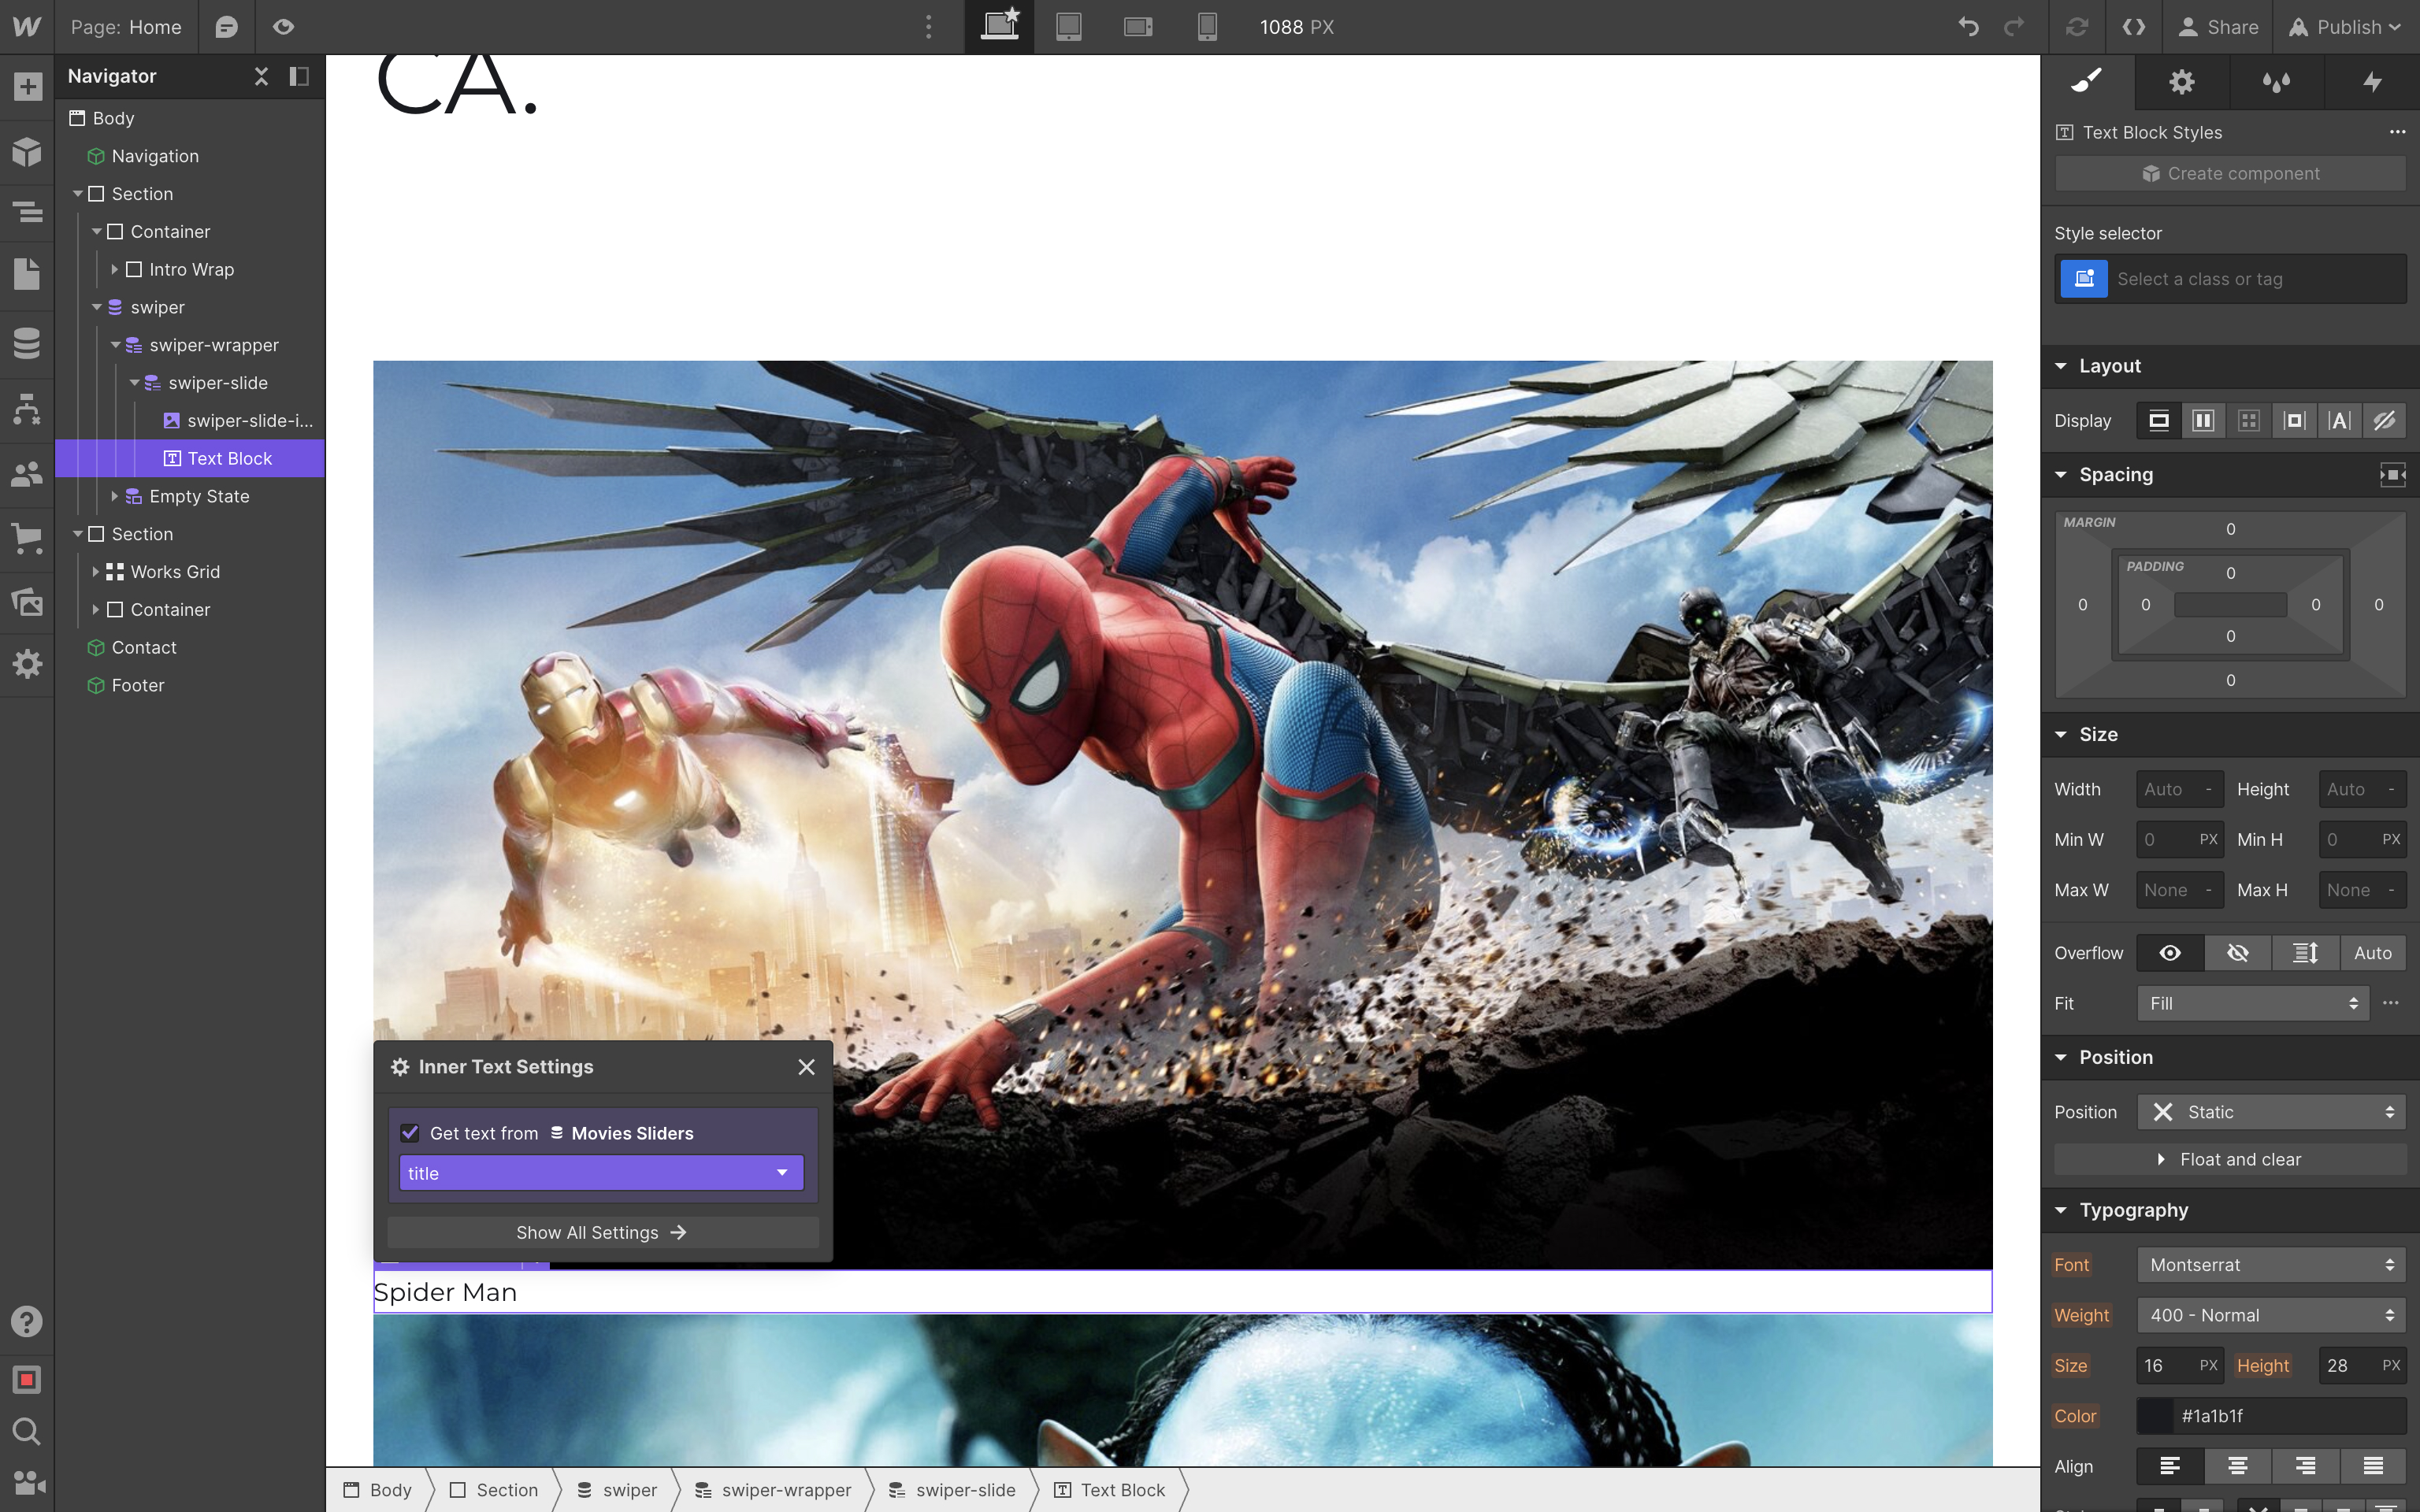
And add swiper-slide-title class to the text:
Add Swiper Assets
Now we need to add Swiper's stylesheet and script.
In page settings and in the Custom Code section add the following code:
- add Swiper stylesheet in the
Inside <head> tagsection:<link rel="stylesheet" href="https://cdn.jsdelivr.net/npm/swiper@12/swiper-bundle.min.css" /> - add Swiper script in the
Before </body> tagsection:<script src="https://cdn.jsdelivr.net/npm/swiper@12/swiper-bundle.min.js"></script>

Styles
With all the basics set up, let's go back to our Swiper component in the designer and apply some styles.
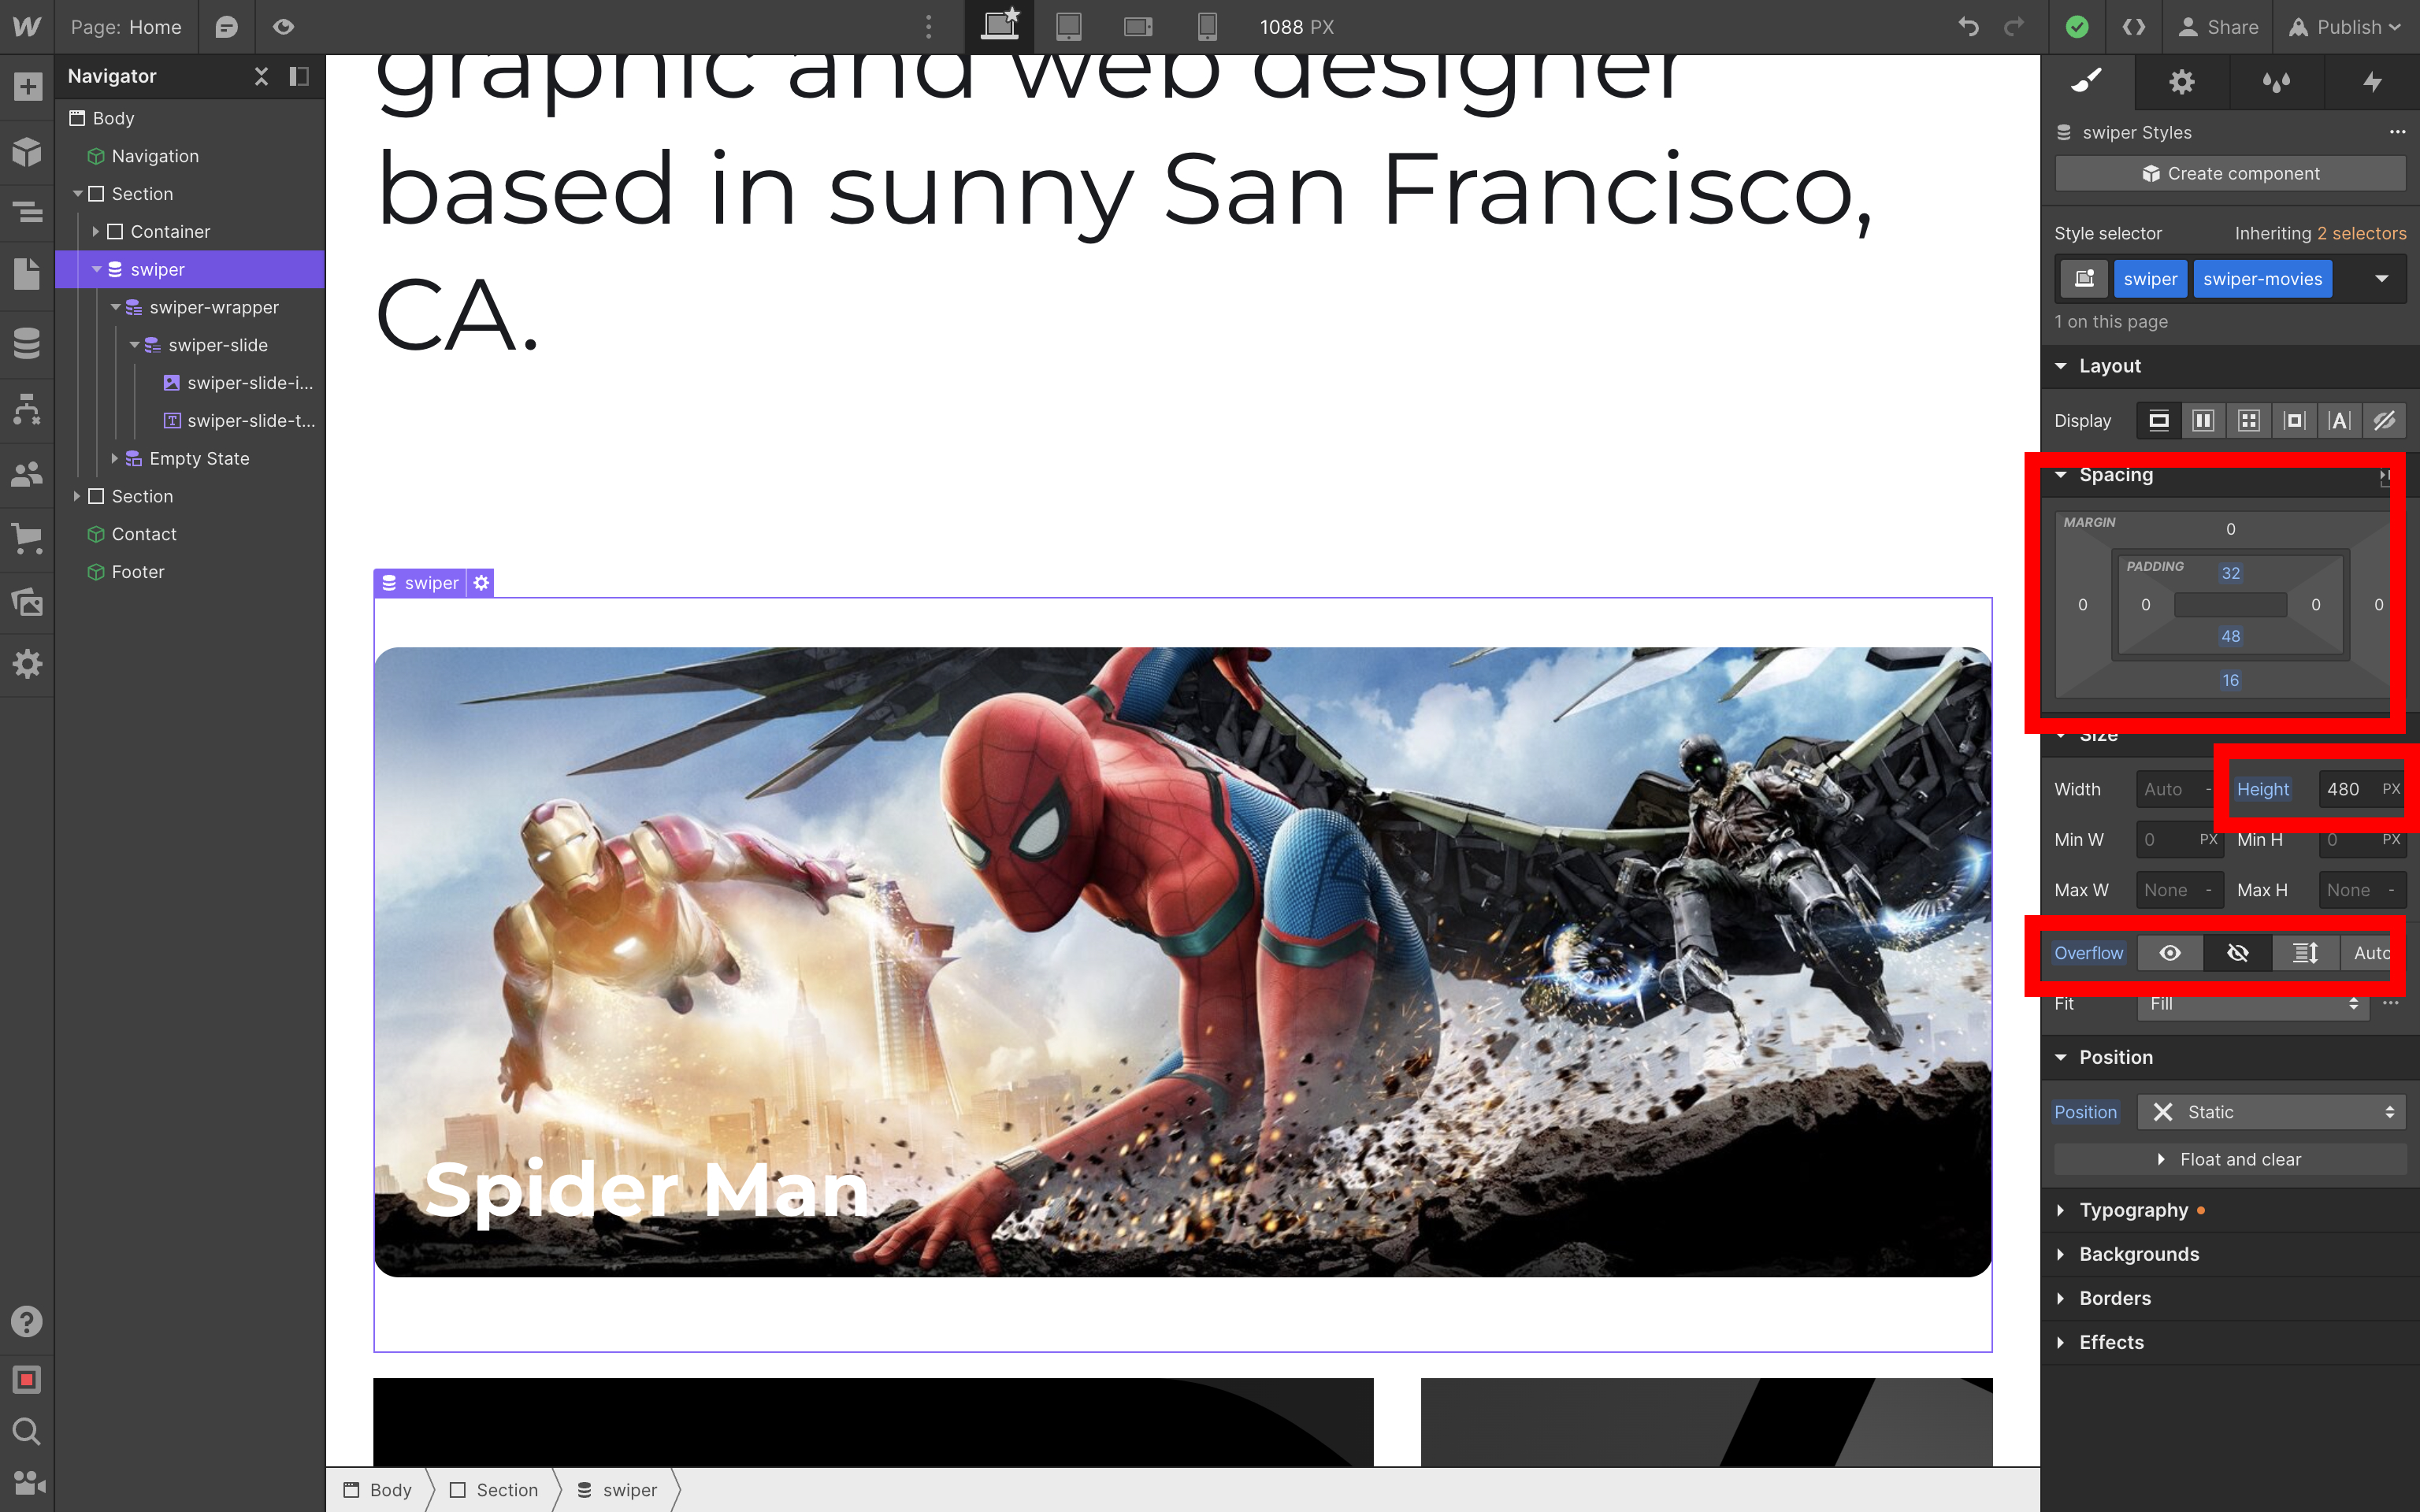
Collection List Wrapper / swiper:
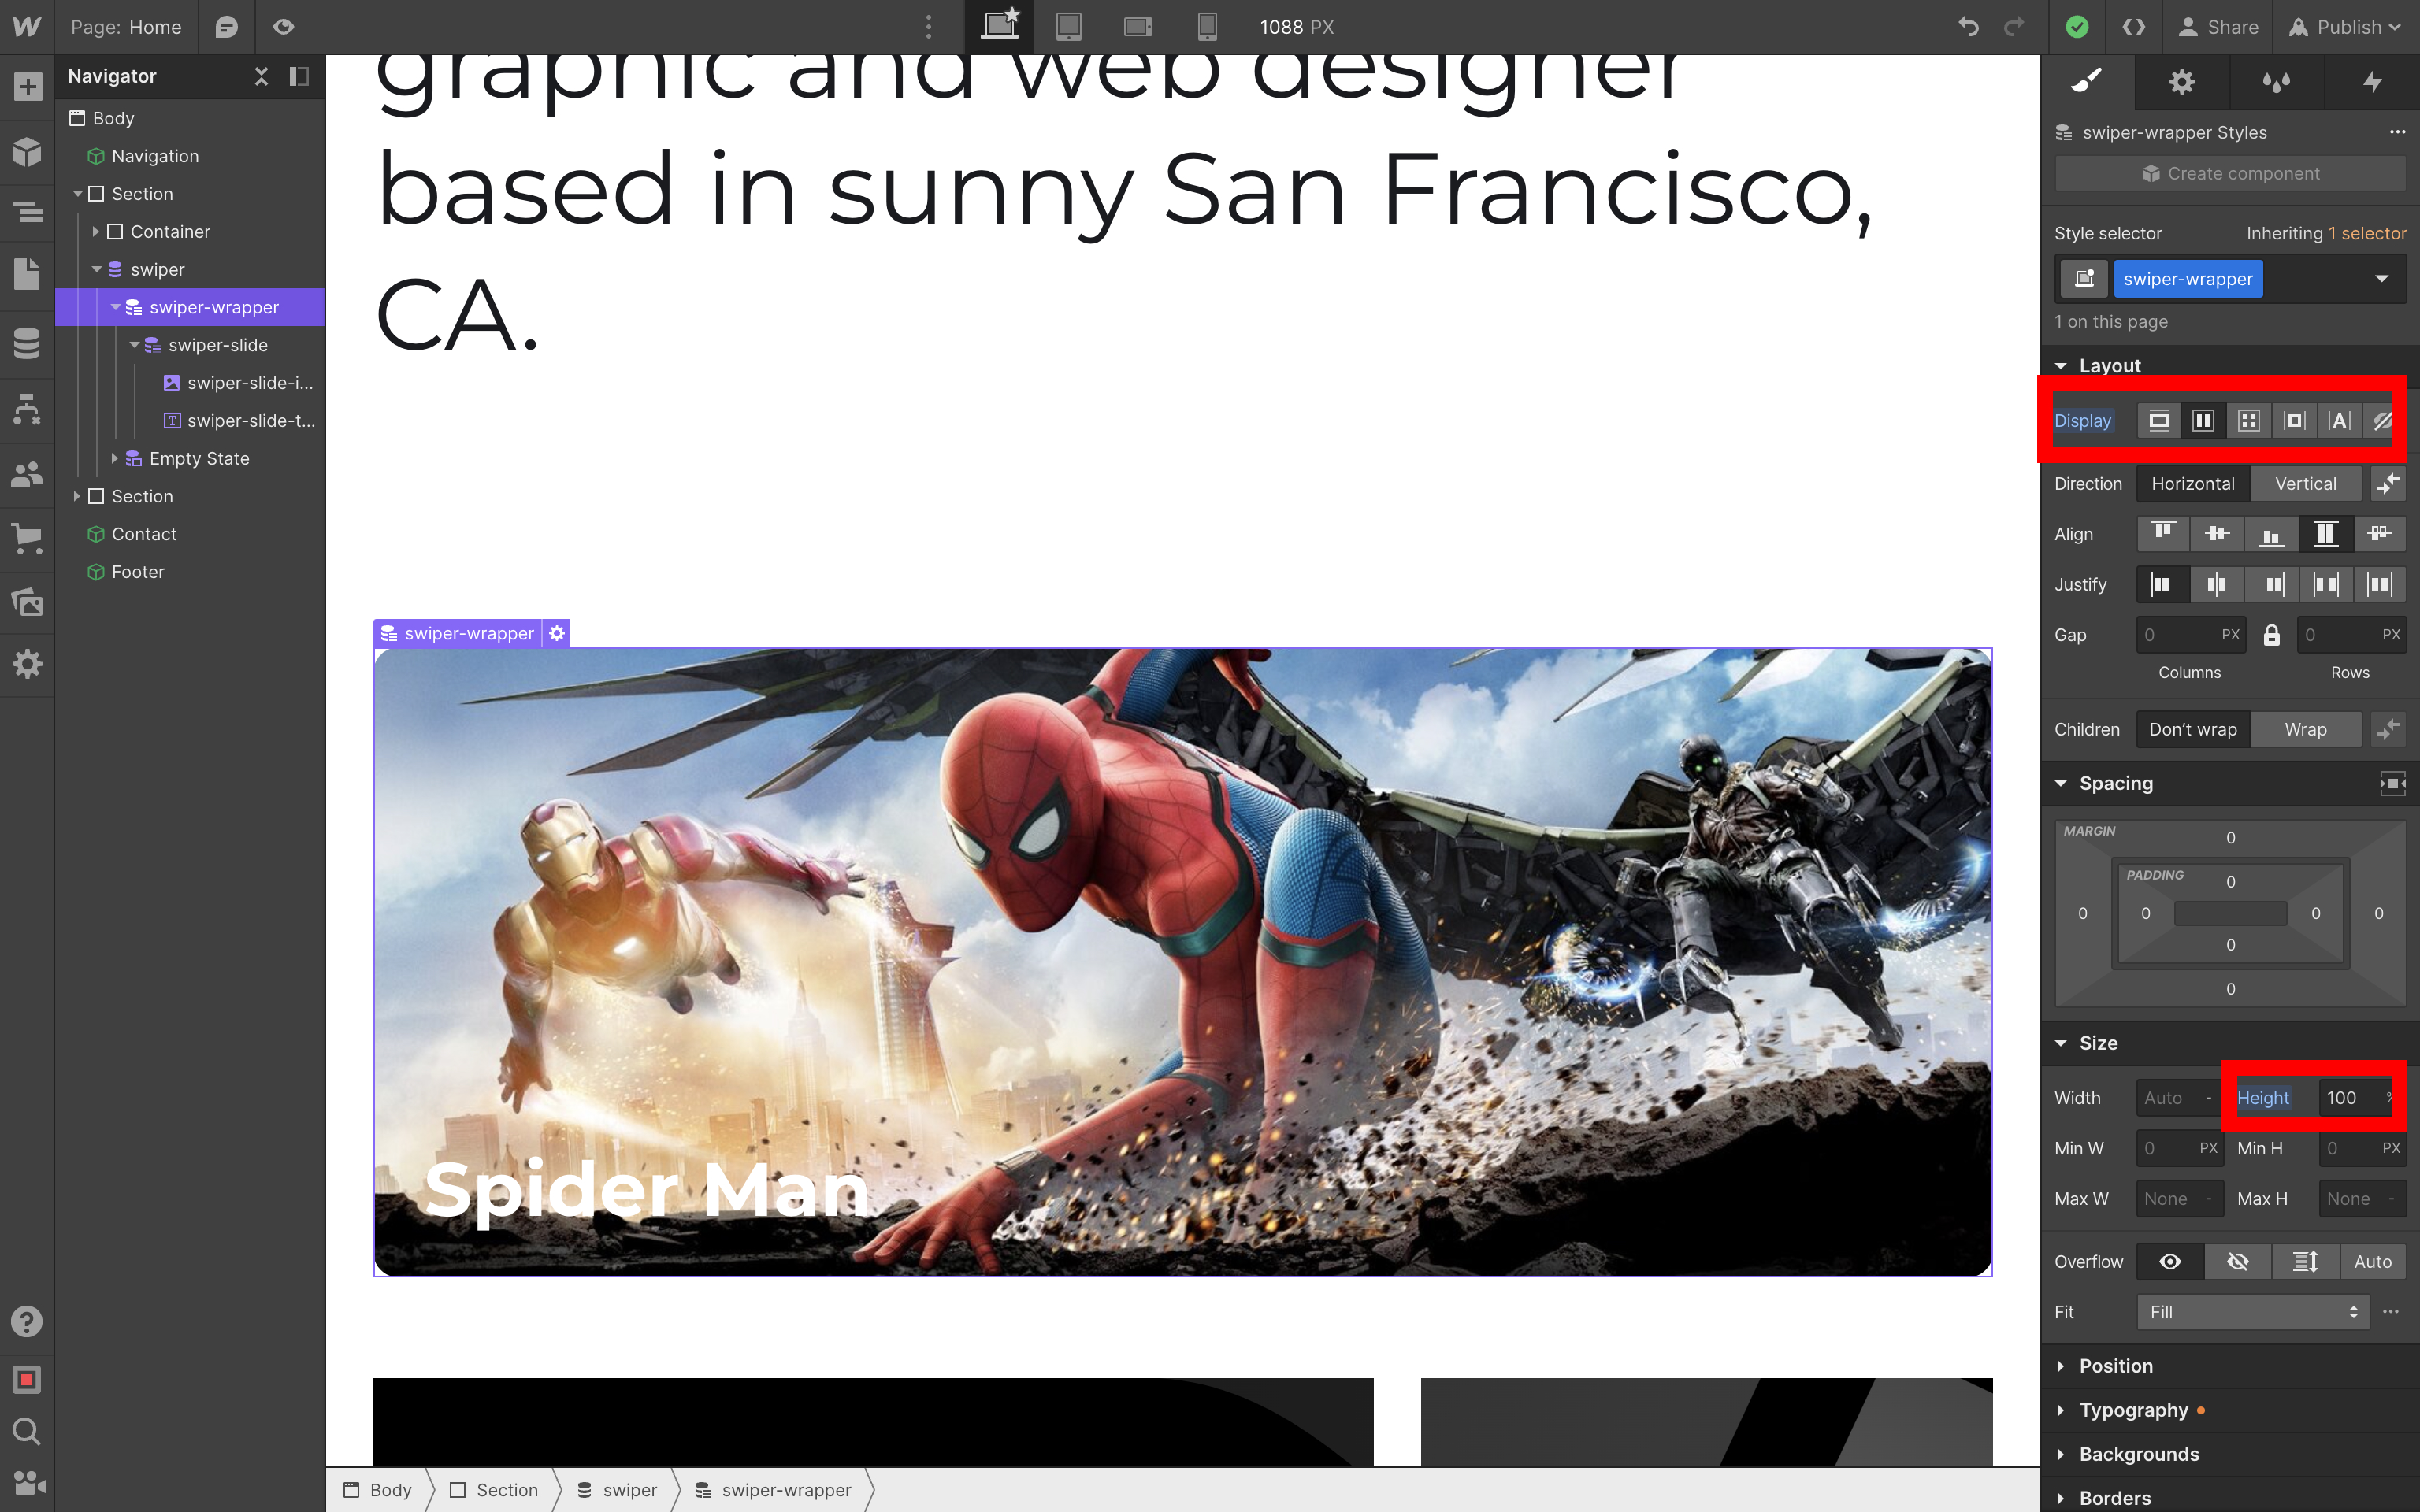
Collection List / swiper-wrapper:
Collection Item / swiper-slide:
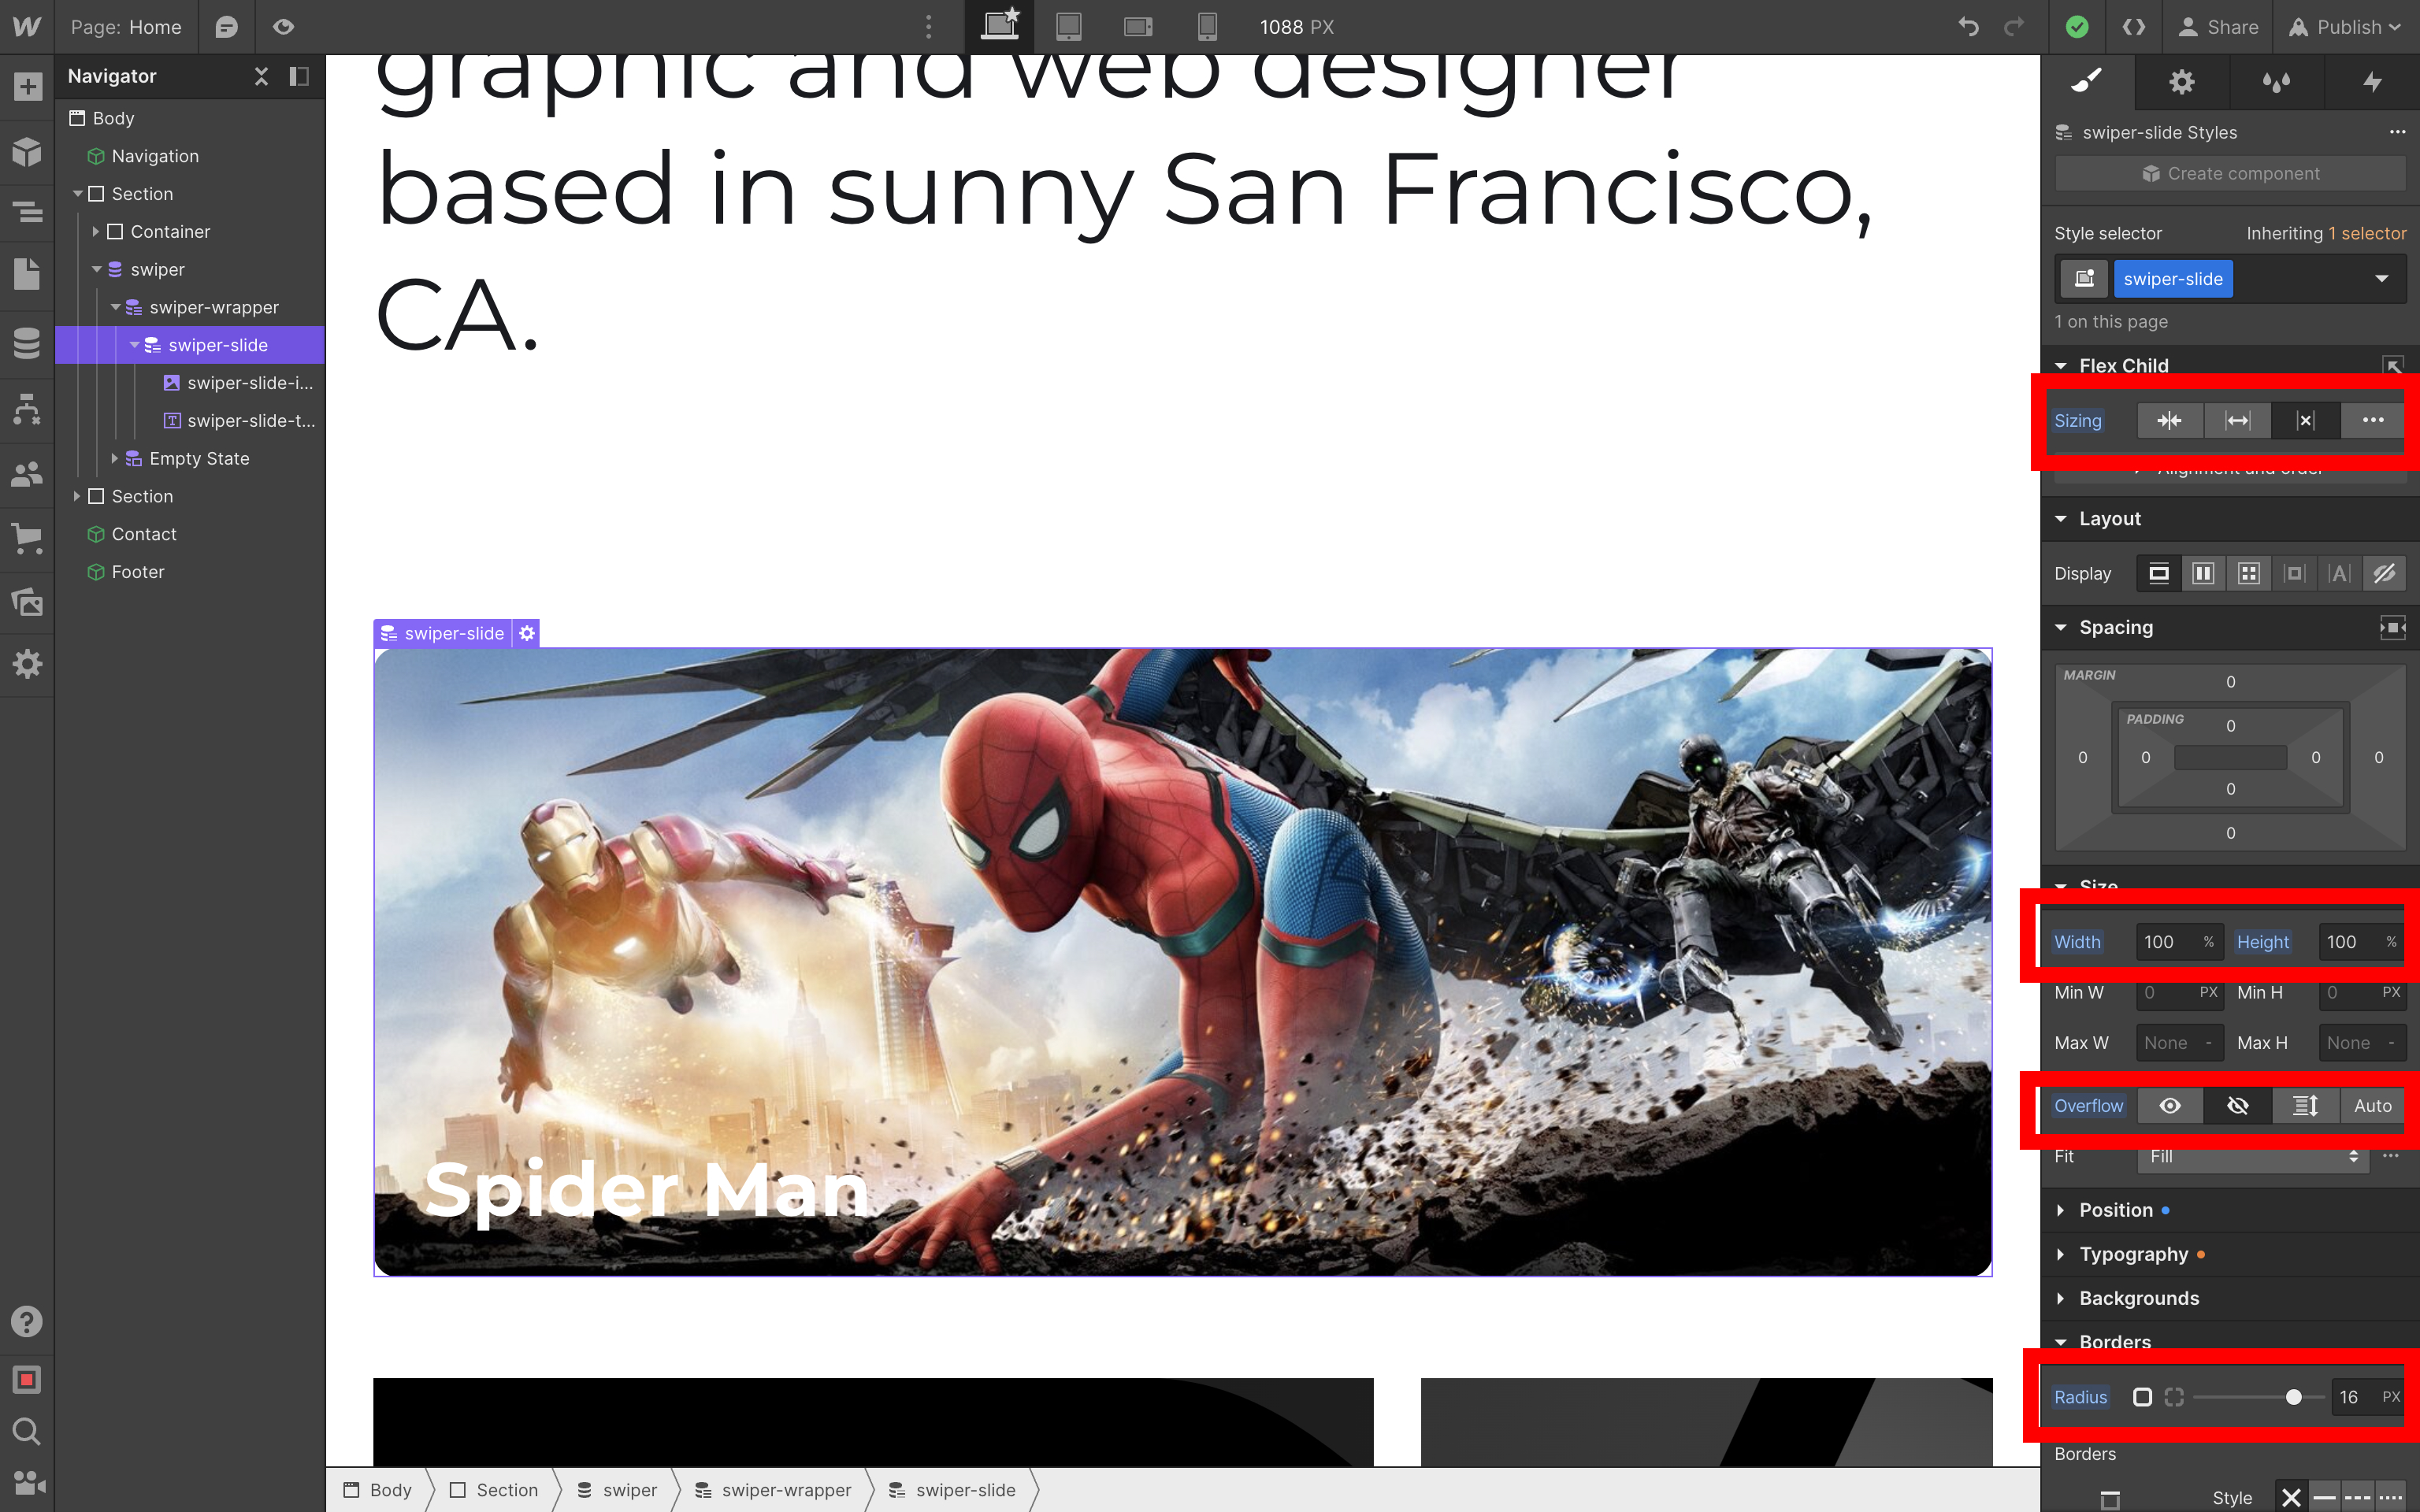
Image / swiper-slide-image:
Text / swiper-slide-title:
Init
Finally, we need to initialize our Swiper. Go back to the Custom Code section in the page settings and change the Before </body> tag section to the following:
<script src="https://cdn.jsdelivr.net/npm/swiper@12/swiper-bundle.min.js"></script>
<script>
const swiper = new Swiper('.swiper-movies', {
effect: 'coverflow',
centeredSlides: true,
slidesPerView: 1,
loop: true,
createElements: true,
pagination: true,
autoplay: true,
breakpoints: {
640: {
slidesPerView: 2,
},
},
});
</script>
We can also tweak Swiper's default pagination by edditing the Inside <head> tag section:
<link
  rel="stylesheet"
  href="https://cdn.jsdelivr.net/npm/swiper@12/swiper-bundle.min.css"
/>
<style>
:root {
--swiper-pagination-color: #000;
}
</style>
Result
As a result, we have an amazing slider on our Webflow website
P.S.
And as always, if you love Swiper, please, support the project:
- Sponsor Swiper - get your logo and link featured on the website
- GitHub Sponsors - support the developer directly
And checking our premium projects:
Your support means a lot for us!